
Hey, y’all! Happy Thursday! As promised, today I’ll be sharing all the details on how I made our inexpensive curtains look high-end on a very reasonable budget!
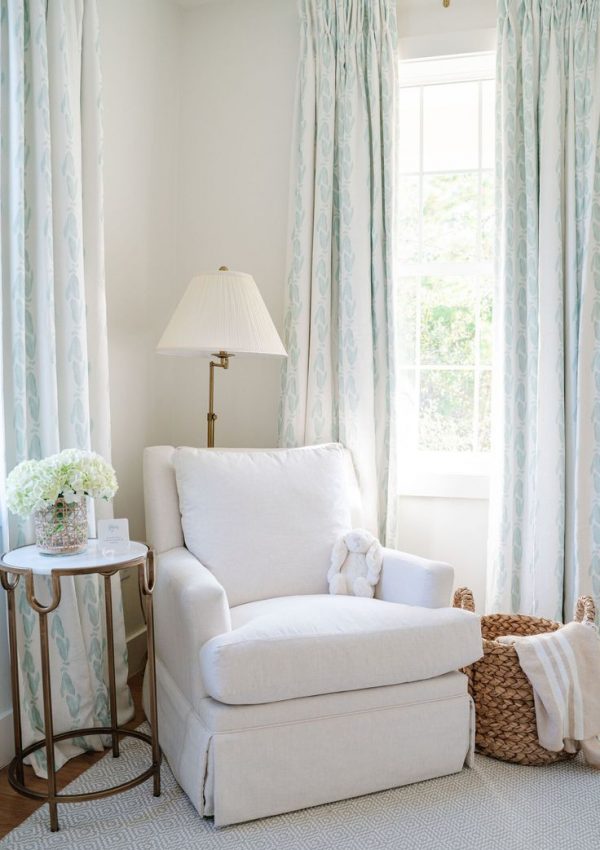
I love listening to interior design podcasts, as I’ve been working on decorating our first home together, one thing I’ve heard over and over again is that one of the easiest ways to tell the difference between a professionally designed home and the average person’s space is the drapery.
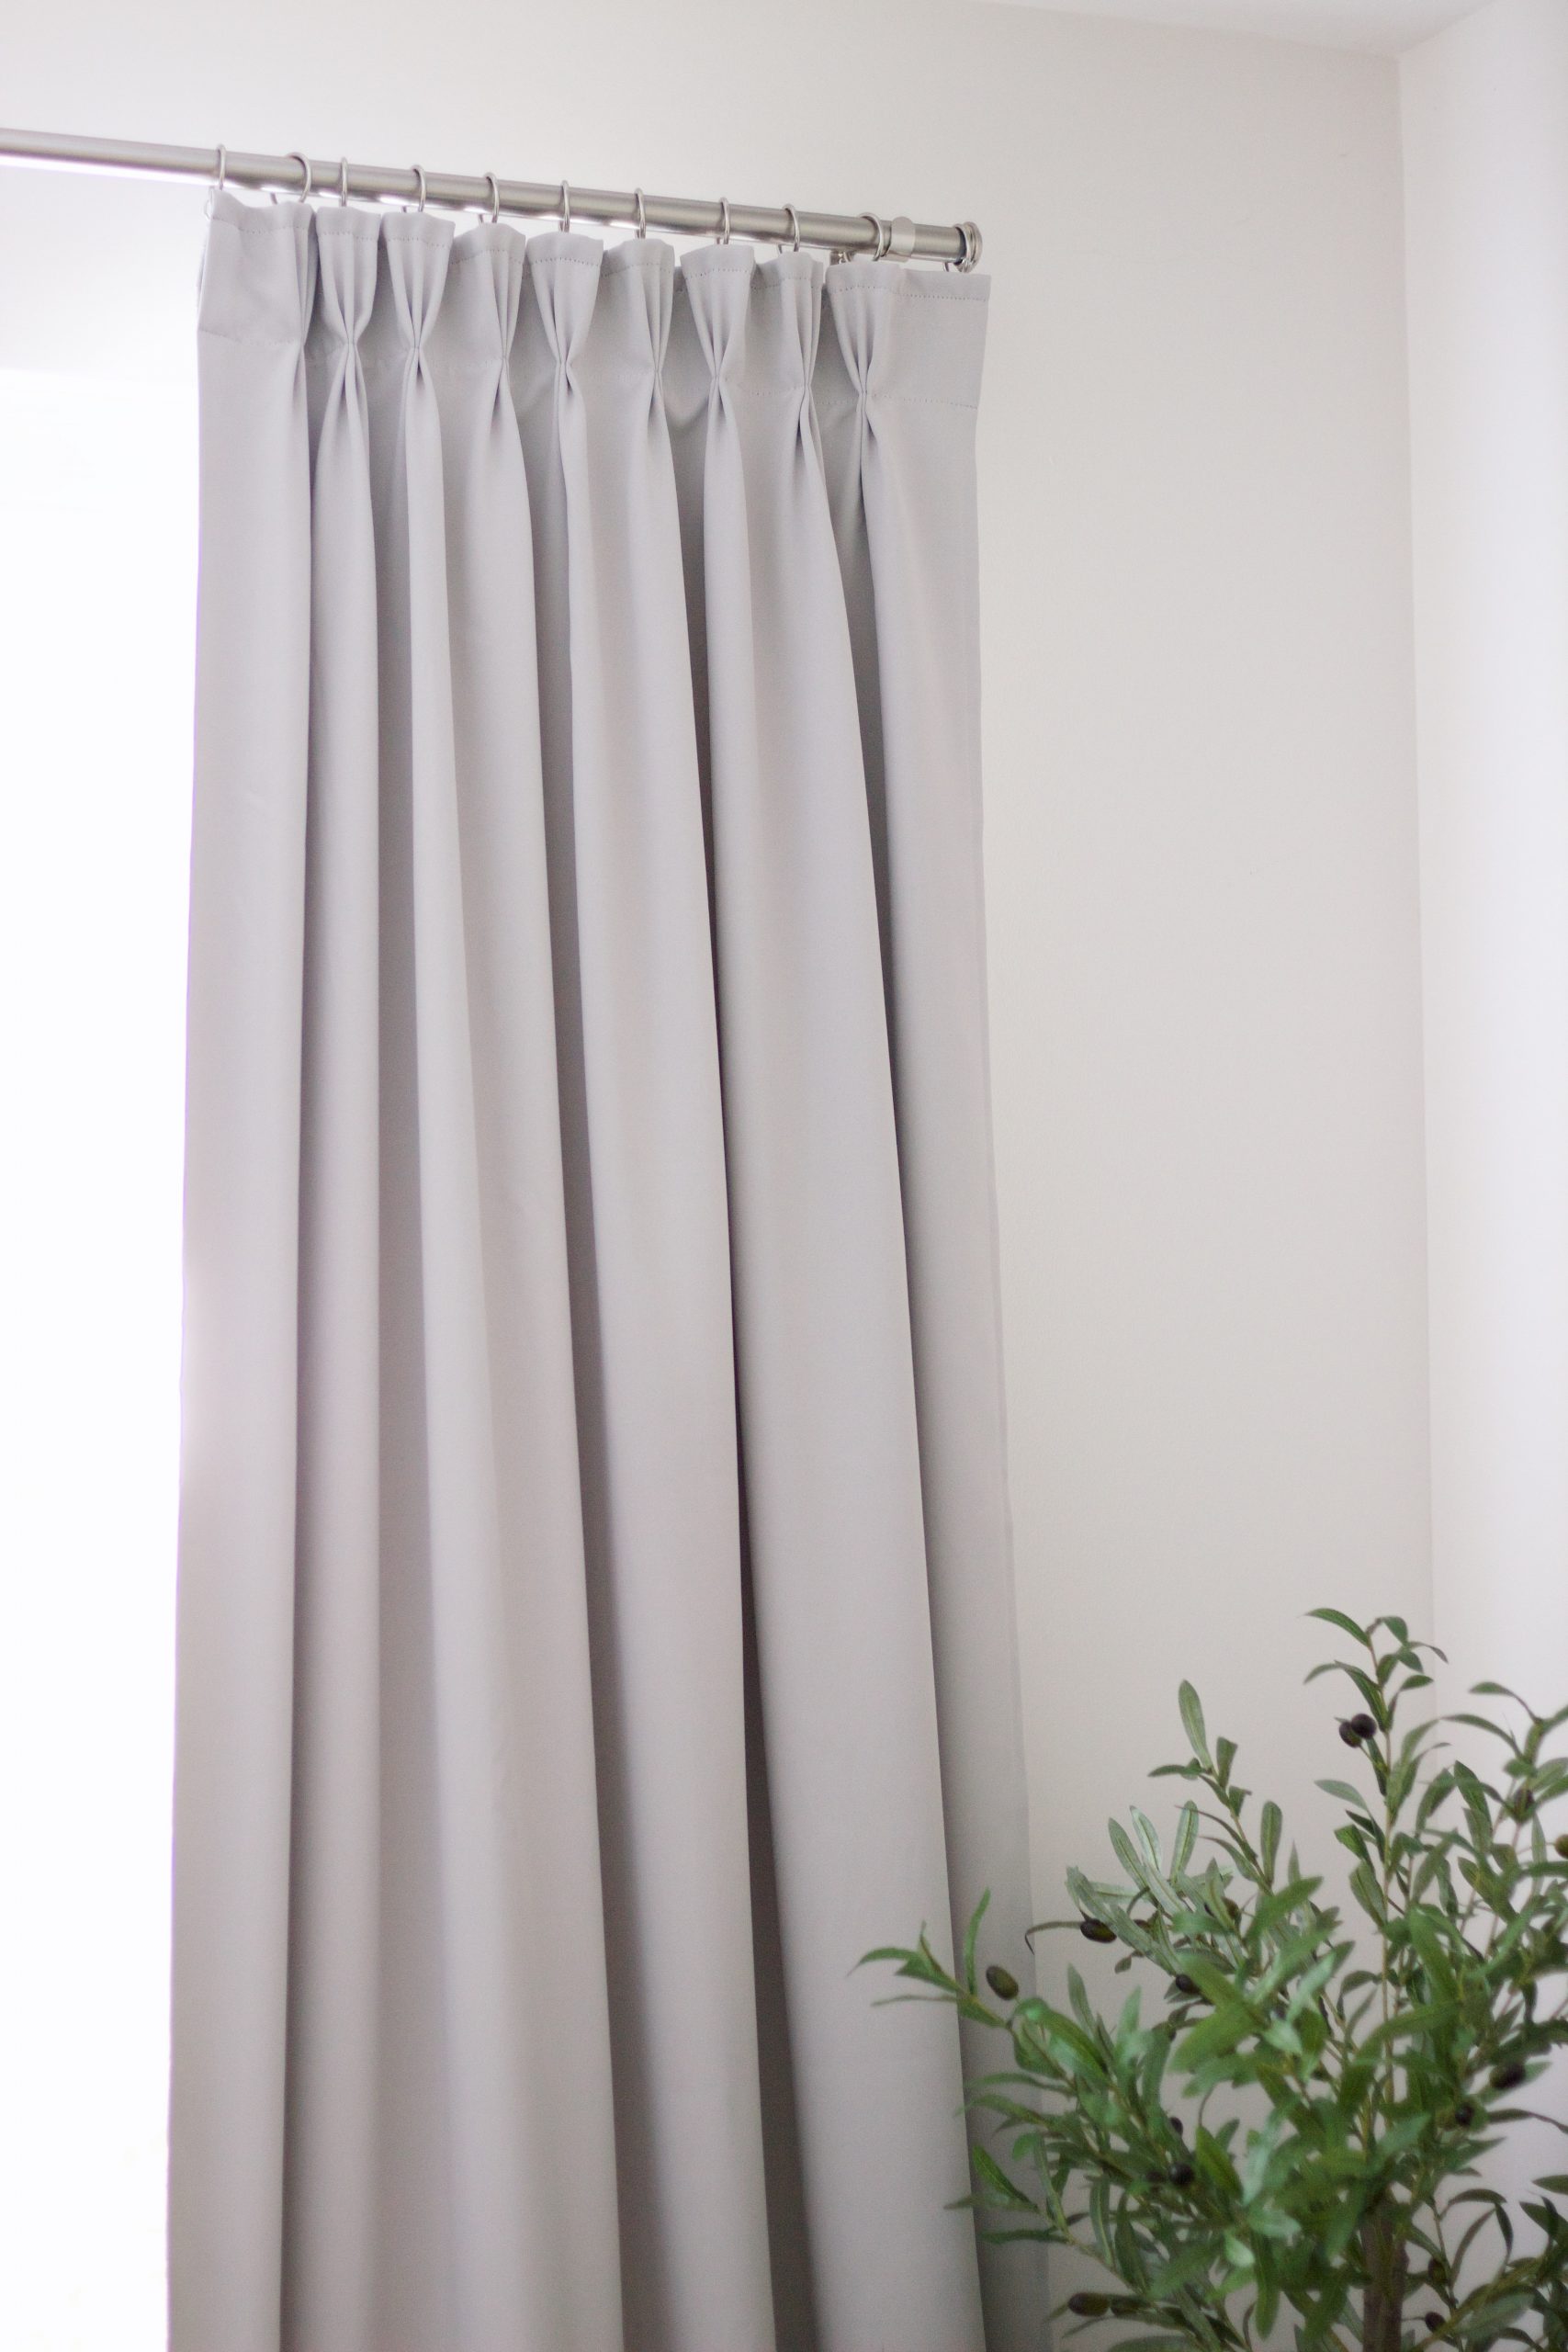
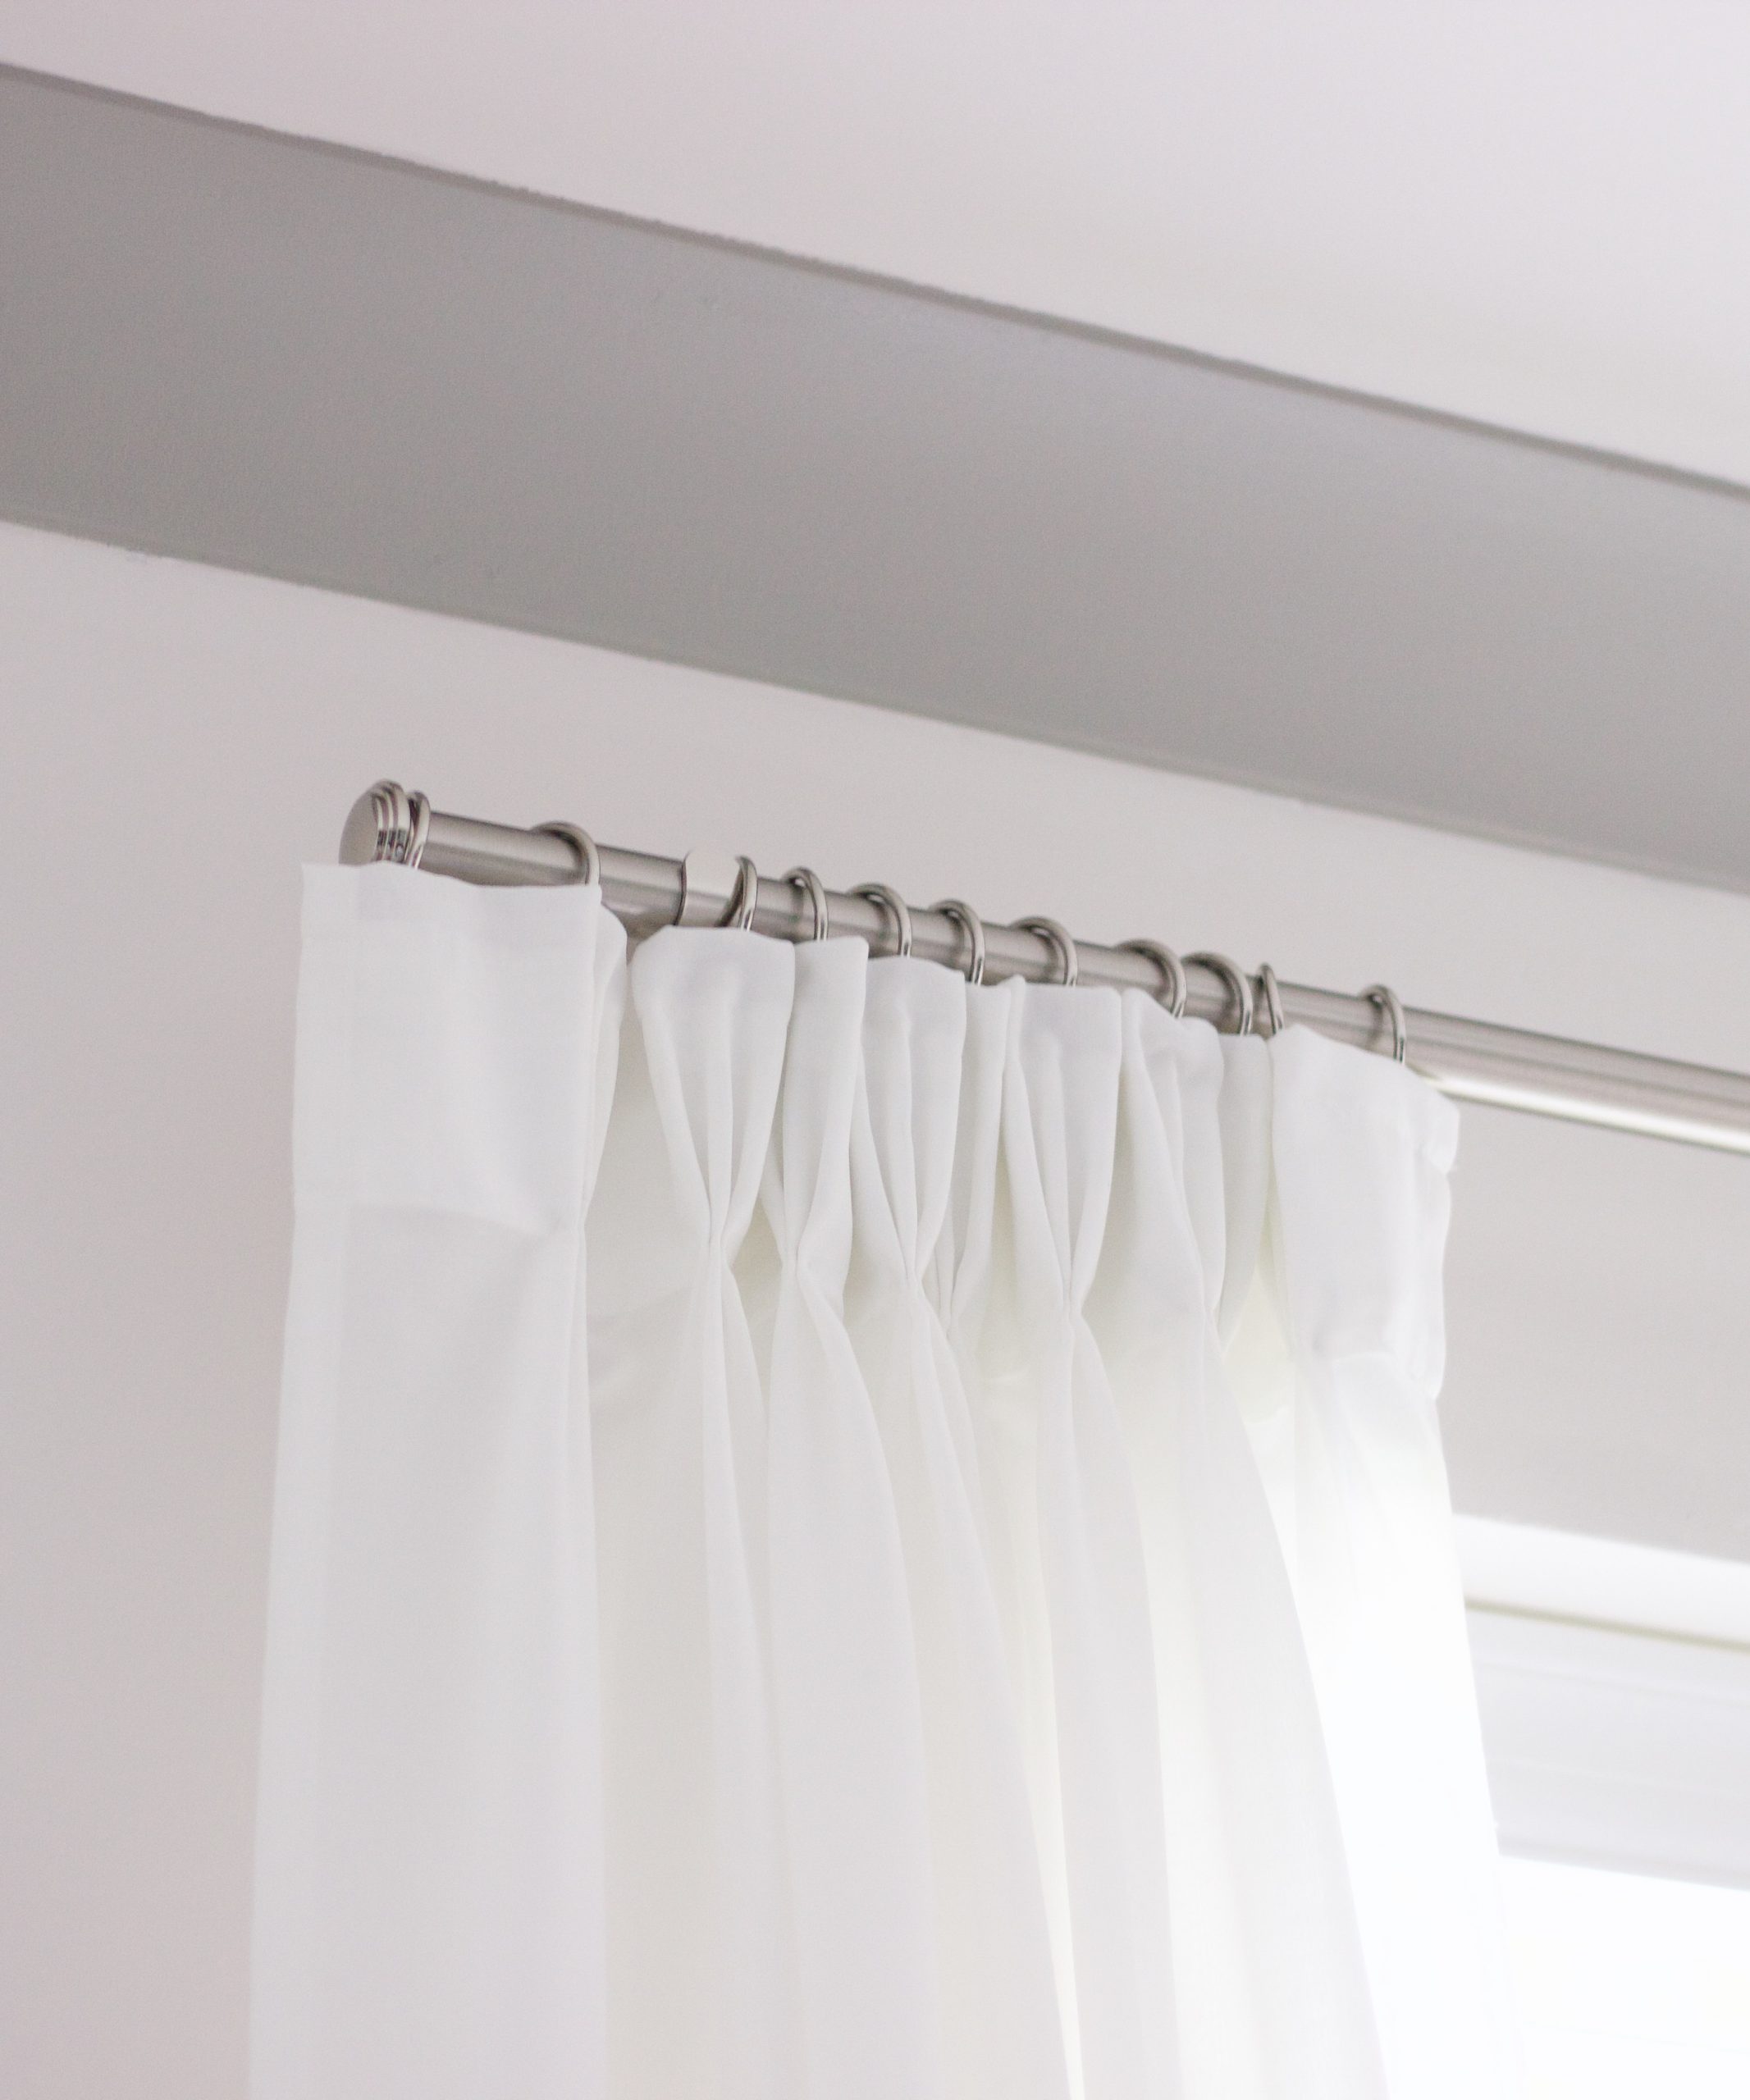
From the hanging methods to the length to the style of the fabric, interior designers pay very close attention to drapery when designing a space. You won’t see any metal grommets or curtains hung through pocket rods. Instead, the drapes are hung neatly on curtain rings (not the clip-on kind) and should always be long enough to just barely graze the floor.
If you’ve ever taken a look at pinch pleat curtains online, you know they can easily go for $150+ per panel. Considering you need two panels per window, that cost is pretty steep – especially since it doesn’t include the cost of the hardware you need to hang everything up!
The good news is that after searching long and hard (and putting in a little elbow grease), I was able to achieve the same look on a much friendlier budget. Here is how I did it!
Supplies You’ll Need:
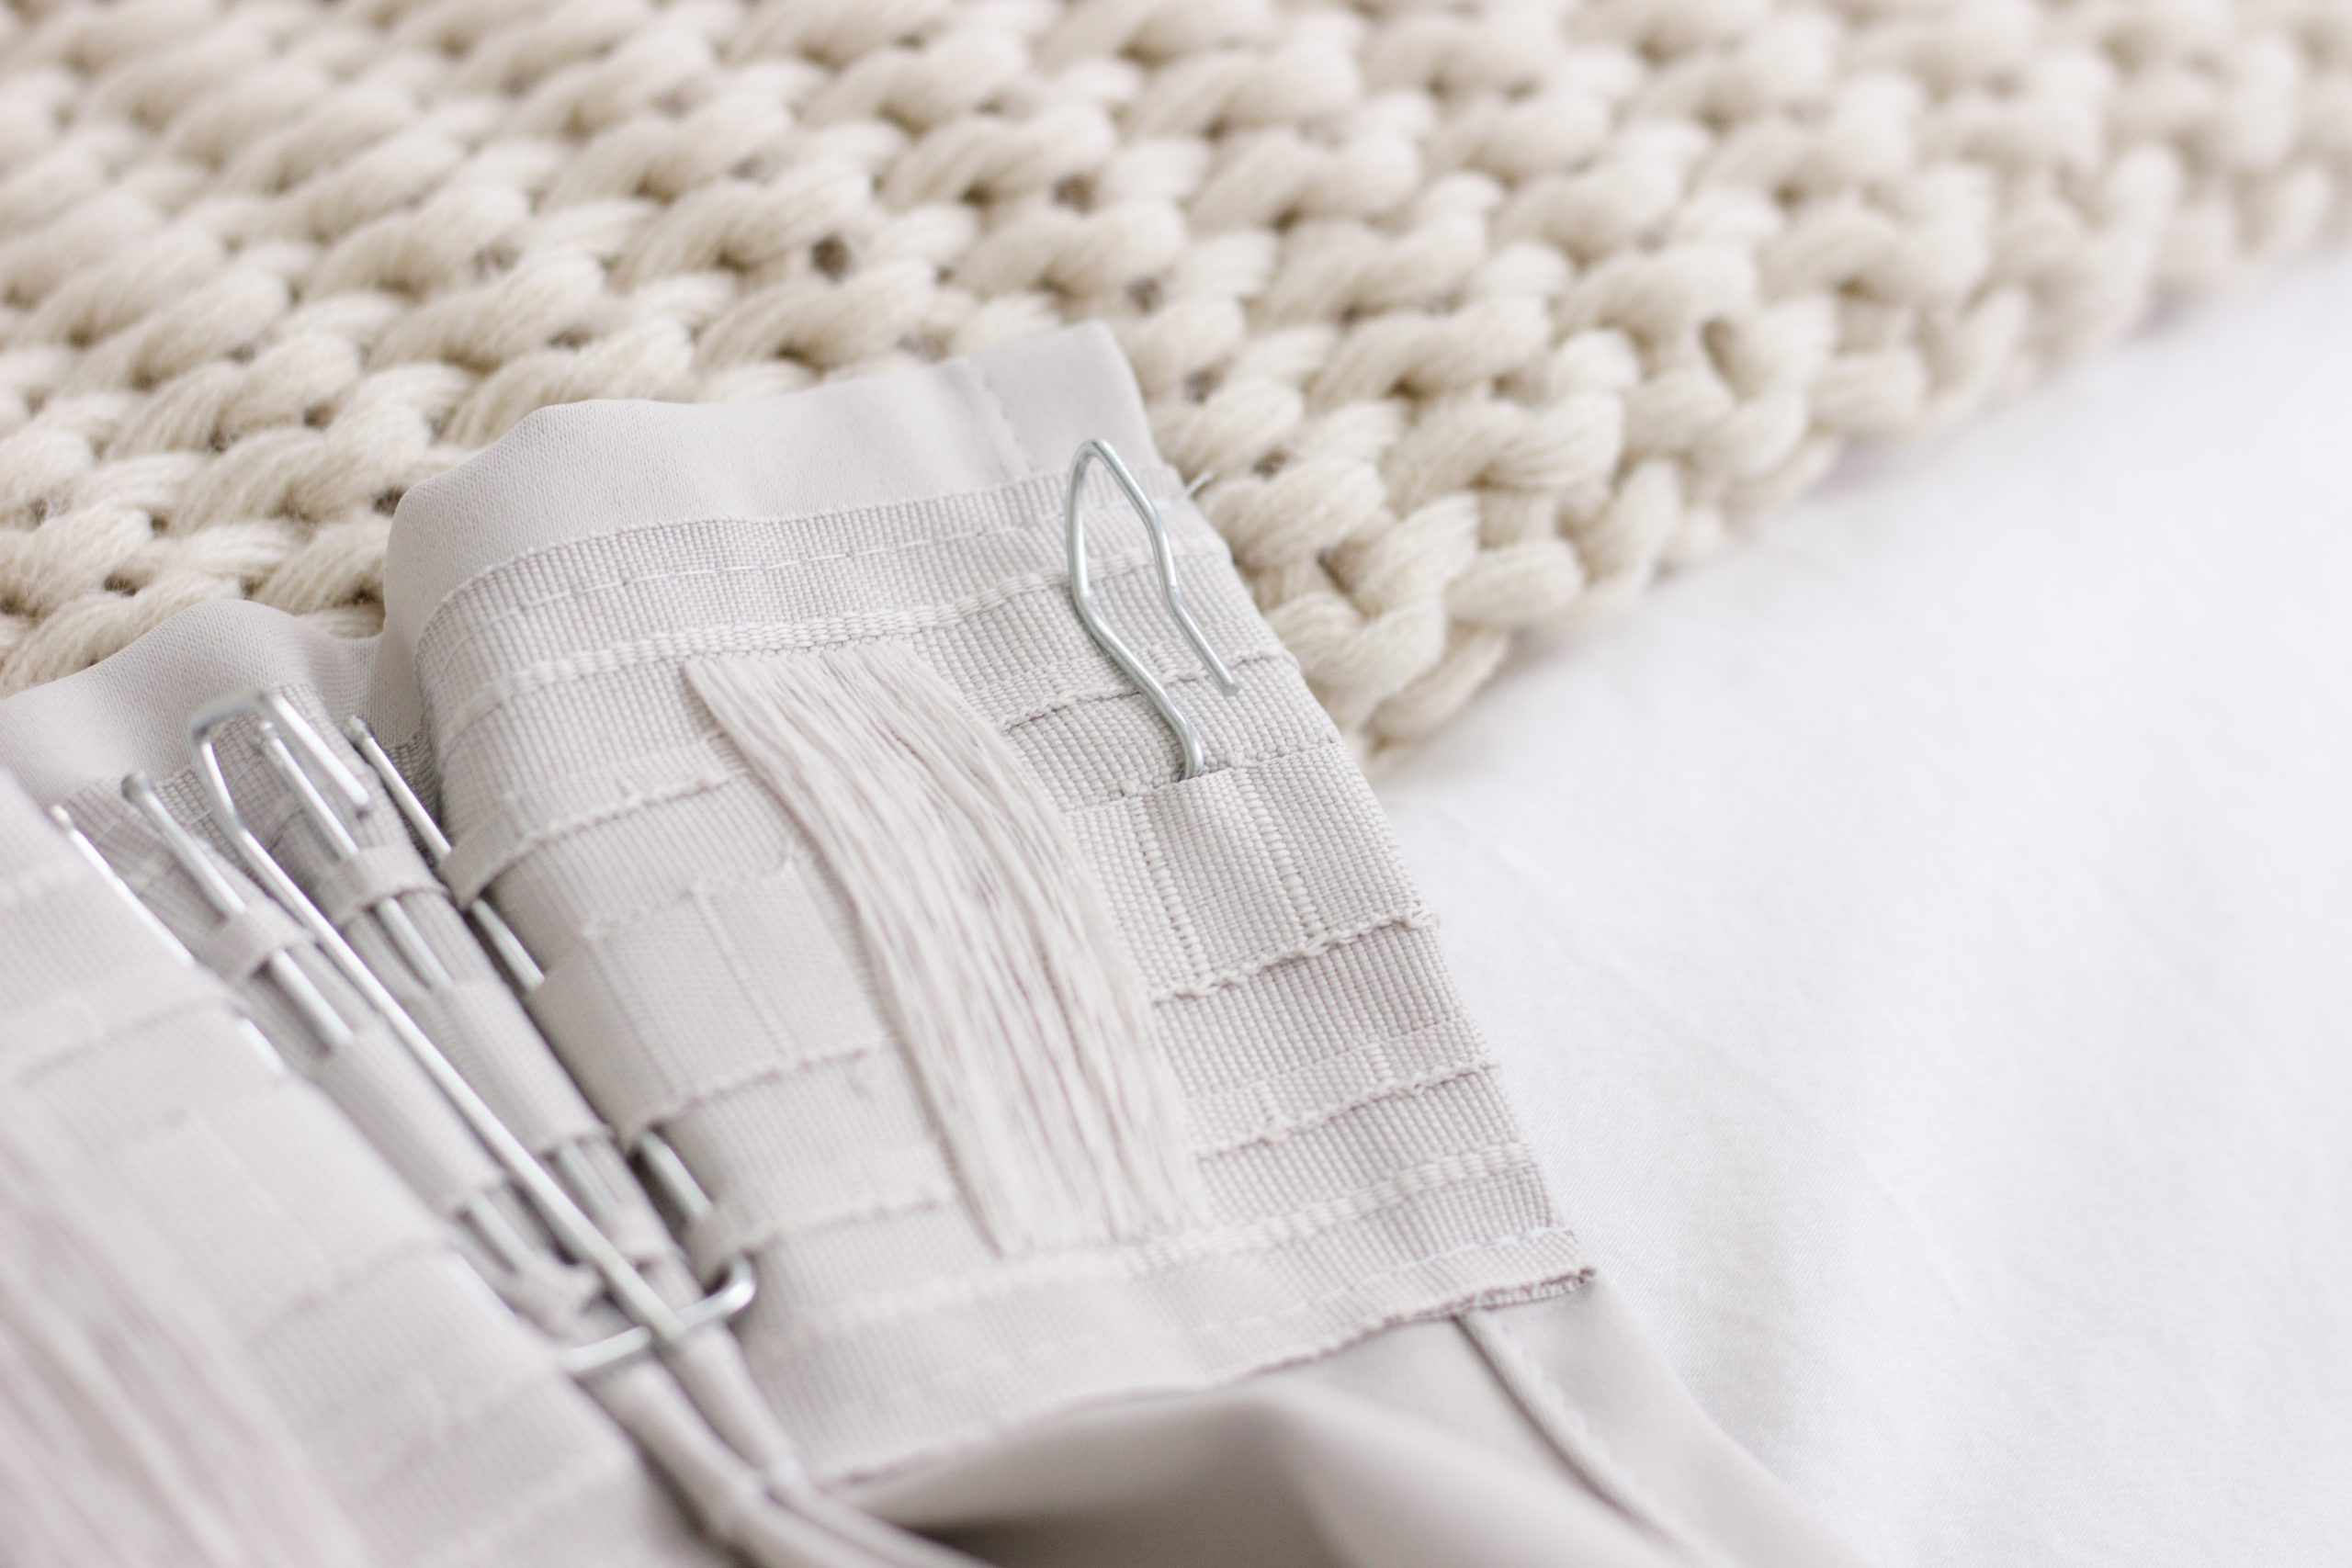
- Drapes: I recommend IKEA curtains, as they come in longer lengths (98″ and 108″), include two panels in each package, and already have pleater tape sewn into the back. Pleater tape is crucial to this DIY, so if you’re trying to pinch pleat curtains you already have (and they don’t have pleater tape on the back), you’ll need to sew some on. You can find pleater tape on Amazon here. If using IKEA curtains (or if your current drapes have pleater tape), no sewing machine is necessary for this DIY! We have IKEA HILJA ($14.99) curtains in our living room and two sets of IKEA MAJGULL ($39.99) curtains in our bedroom.
- Pleater Hooks: IKEA does sell pleater hooks, but they only create double pleats. I prefer these hooks from Amazon for a triple pleat look. We used 9 pleater hooks per panel (18 hooks per window).
- Drapery Pins: You’ll need two regular drapery pins for the ends of each panel (four pins per window). We ordered these ones from Amazon, and they worked great with the other pleater hooks!
- Curtain Rings: We purchased these curtain rings in brushed nickel from Amazon and they’re great! They come in tons of different finishes, so if you already have a curtain rod hanging, you shouldn’t have any issue finding them in a matching finish. For IKEA curtains, you’ll need 11 rings per panel (22 rings per window).
- Curtain Rod: Since we didn’t have any curtain rods hanging in our apartment yet, we decided to go with these matching curtain rods from the same brand. I love the subtle elegance of the finials, and I think they look very high-end – especially for the price!
- Sewing Kit: Most of y’all probably have a small sewing kit on hand, but I didn’t, so I had to order one. All you’ll really need is a sewing needle and thread that matches the color of your curtains.

Step 1:
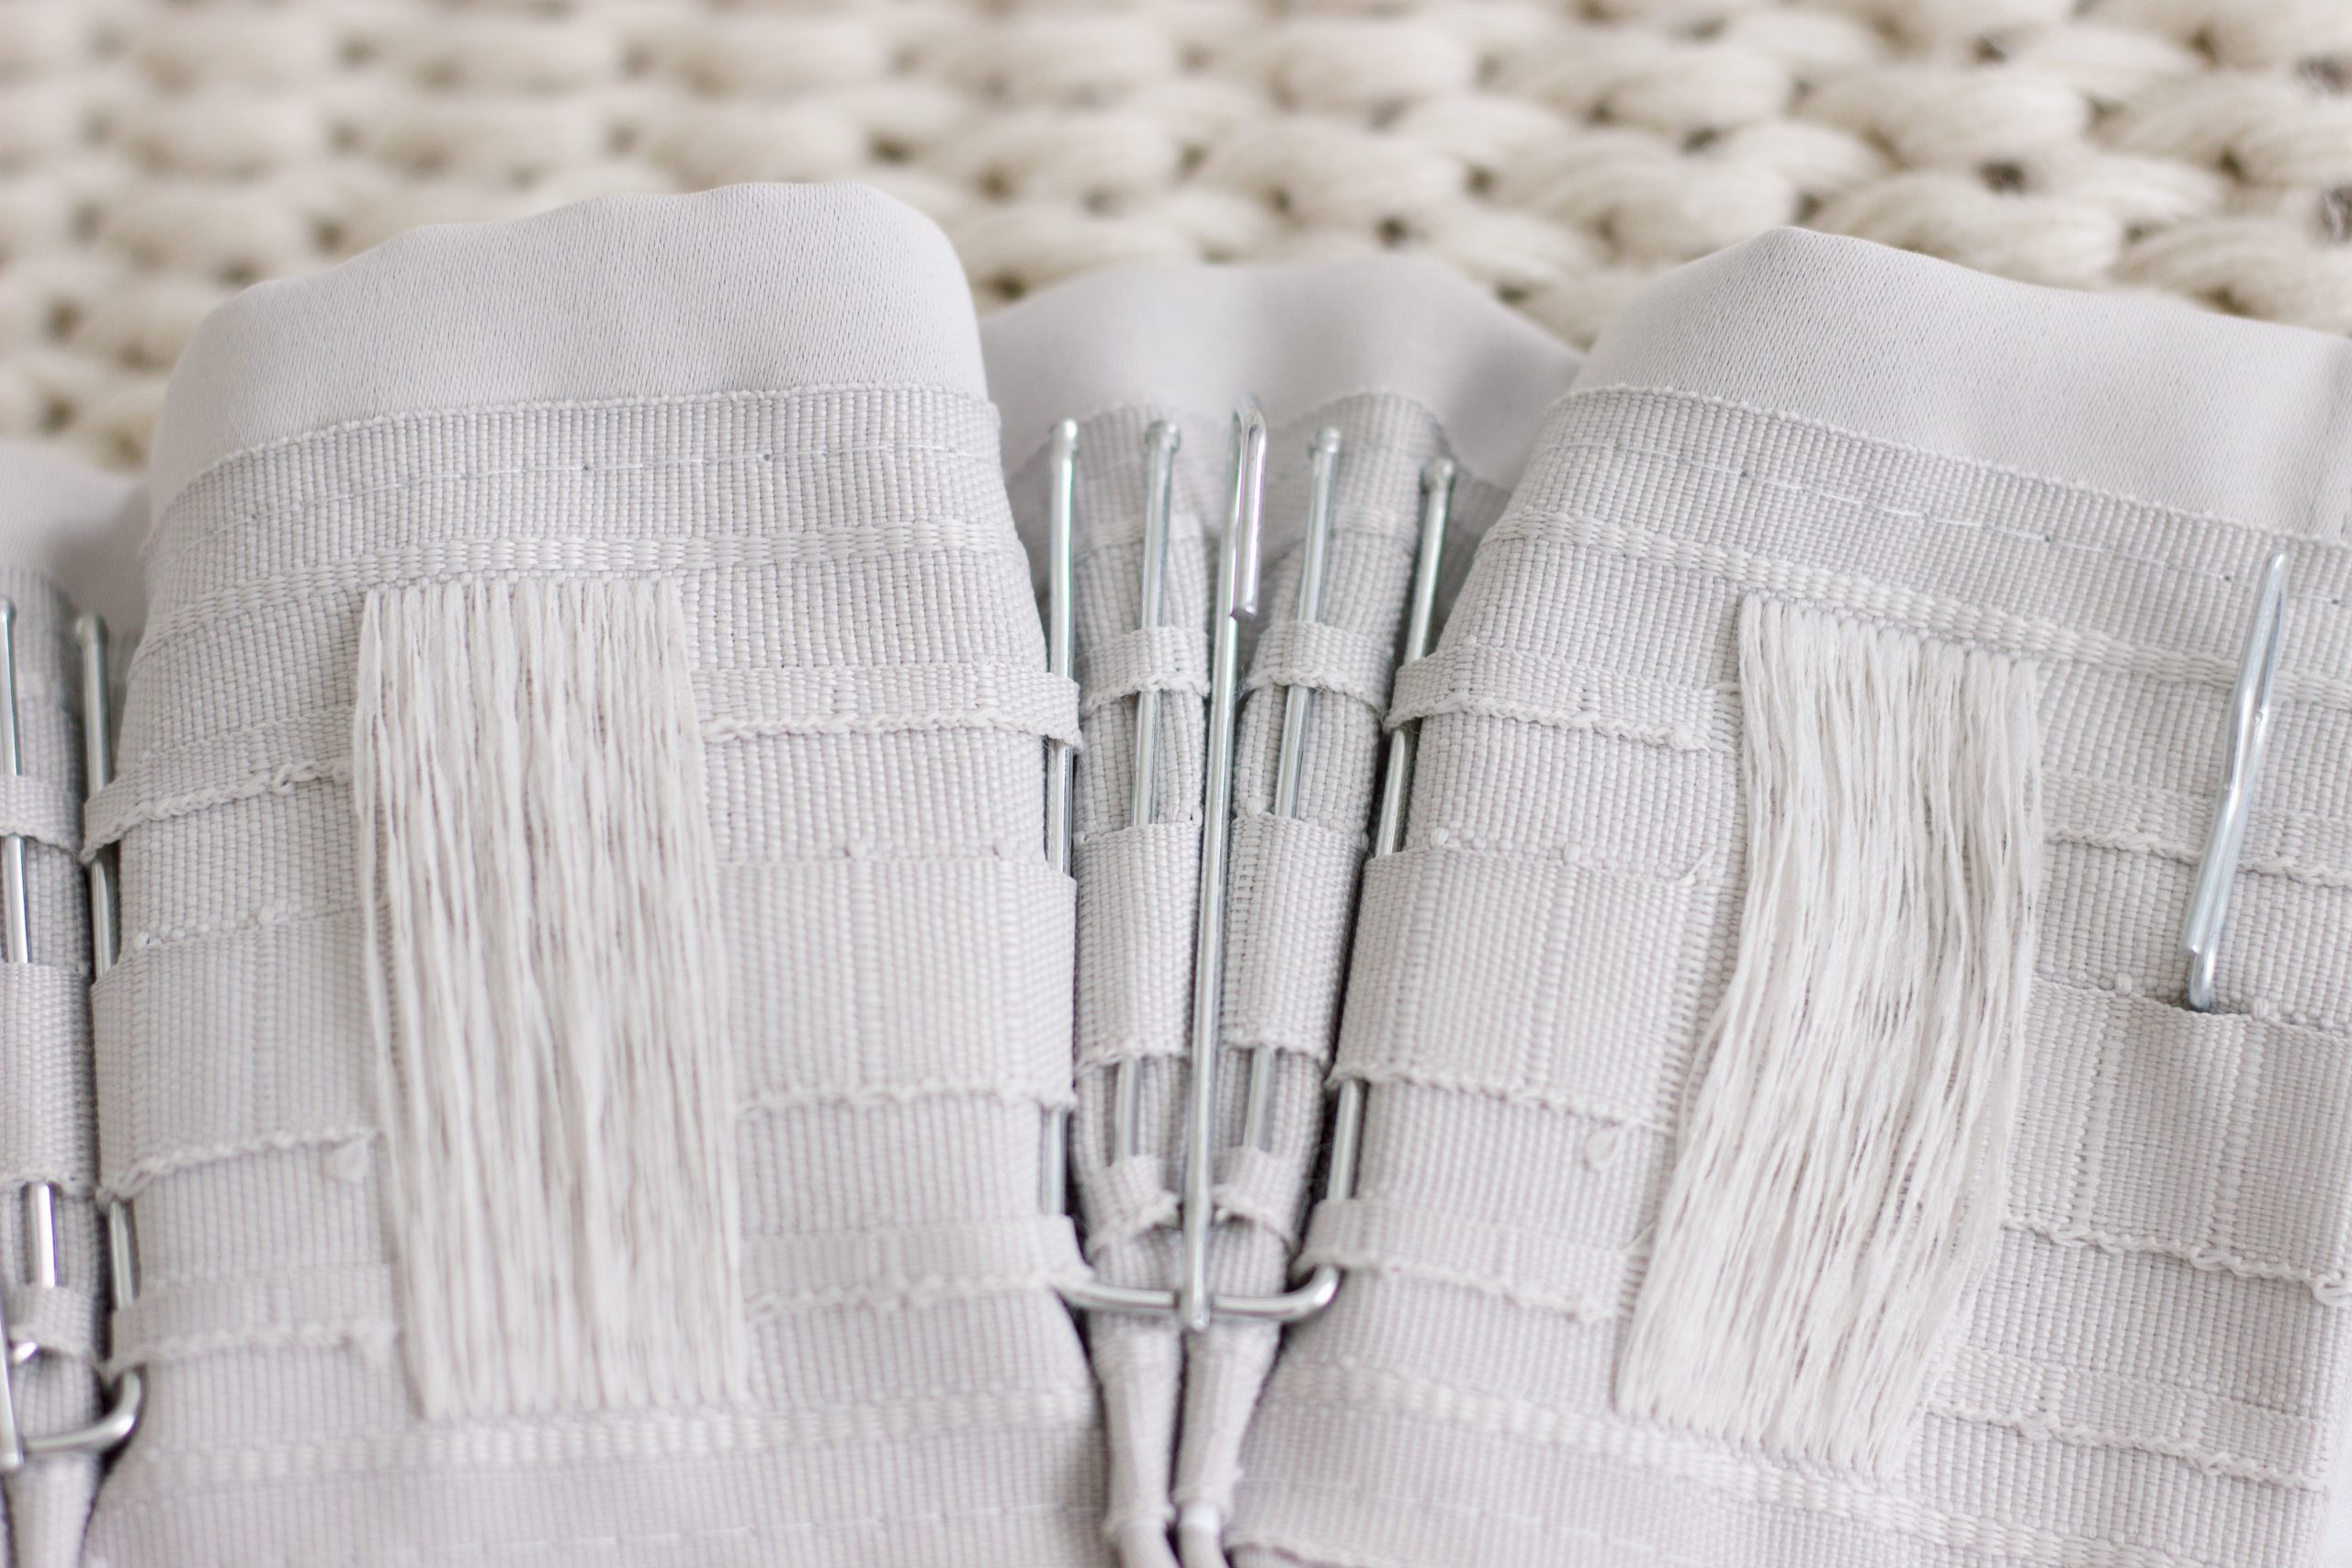
First, you’ll want to start by installing the pleater hooks. Another great thing about IKEA curtains is that they have evenly spaced tabs on the back that make it super easy to space your pleater hooks.
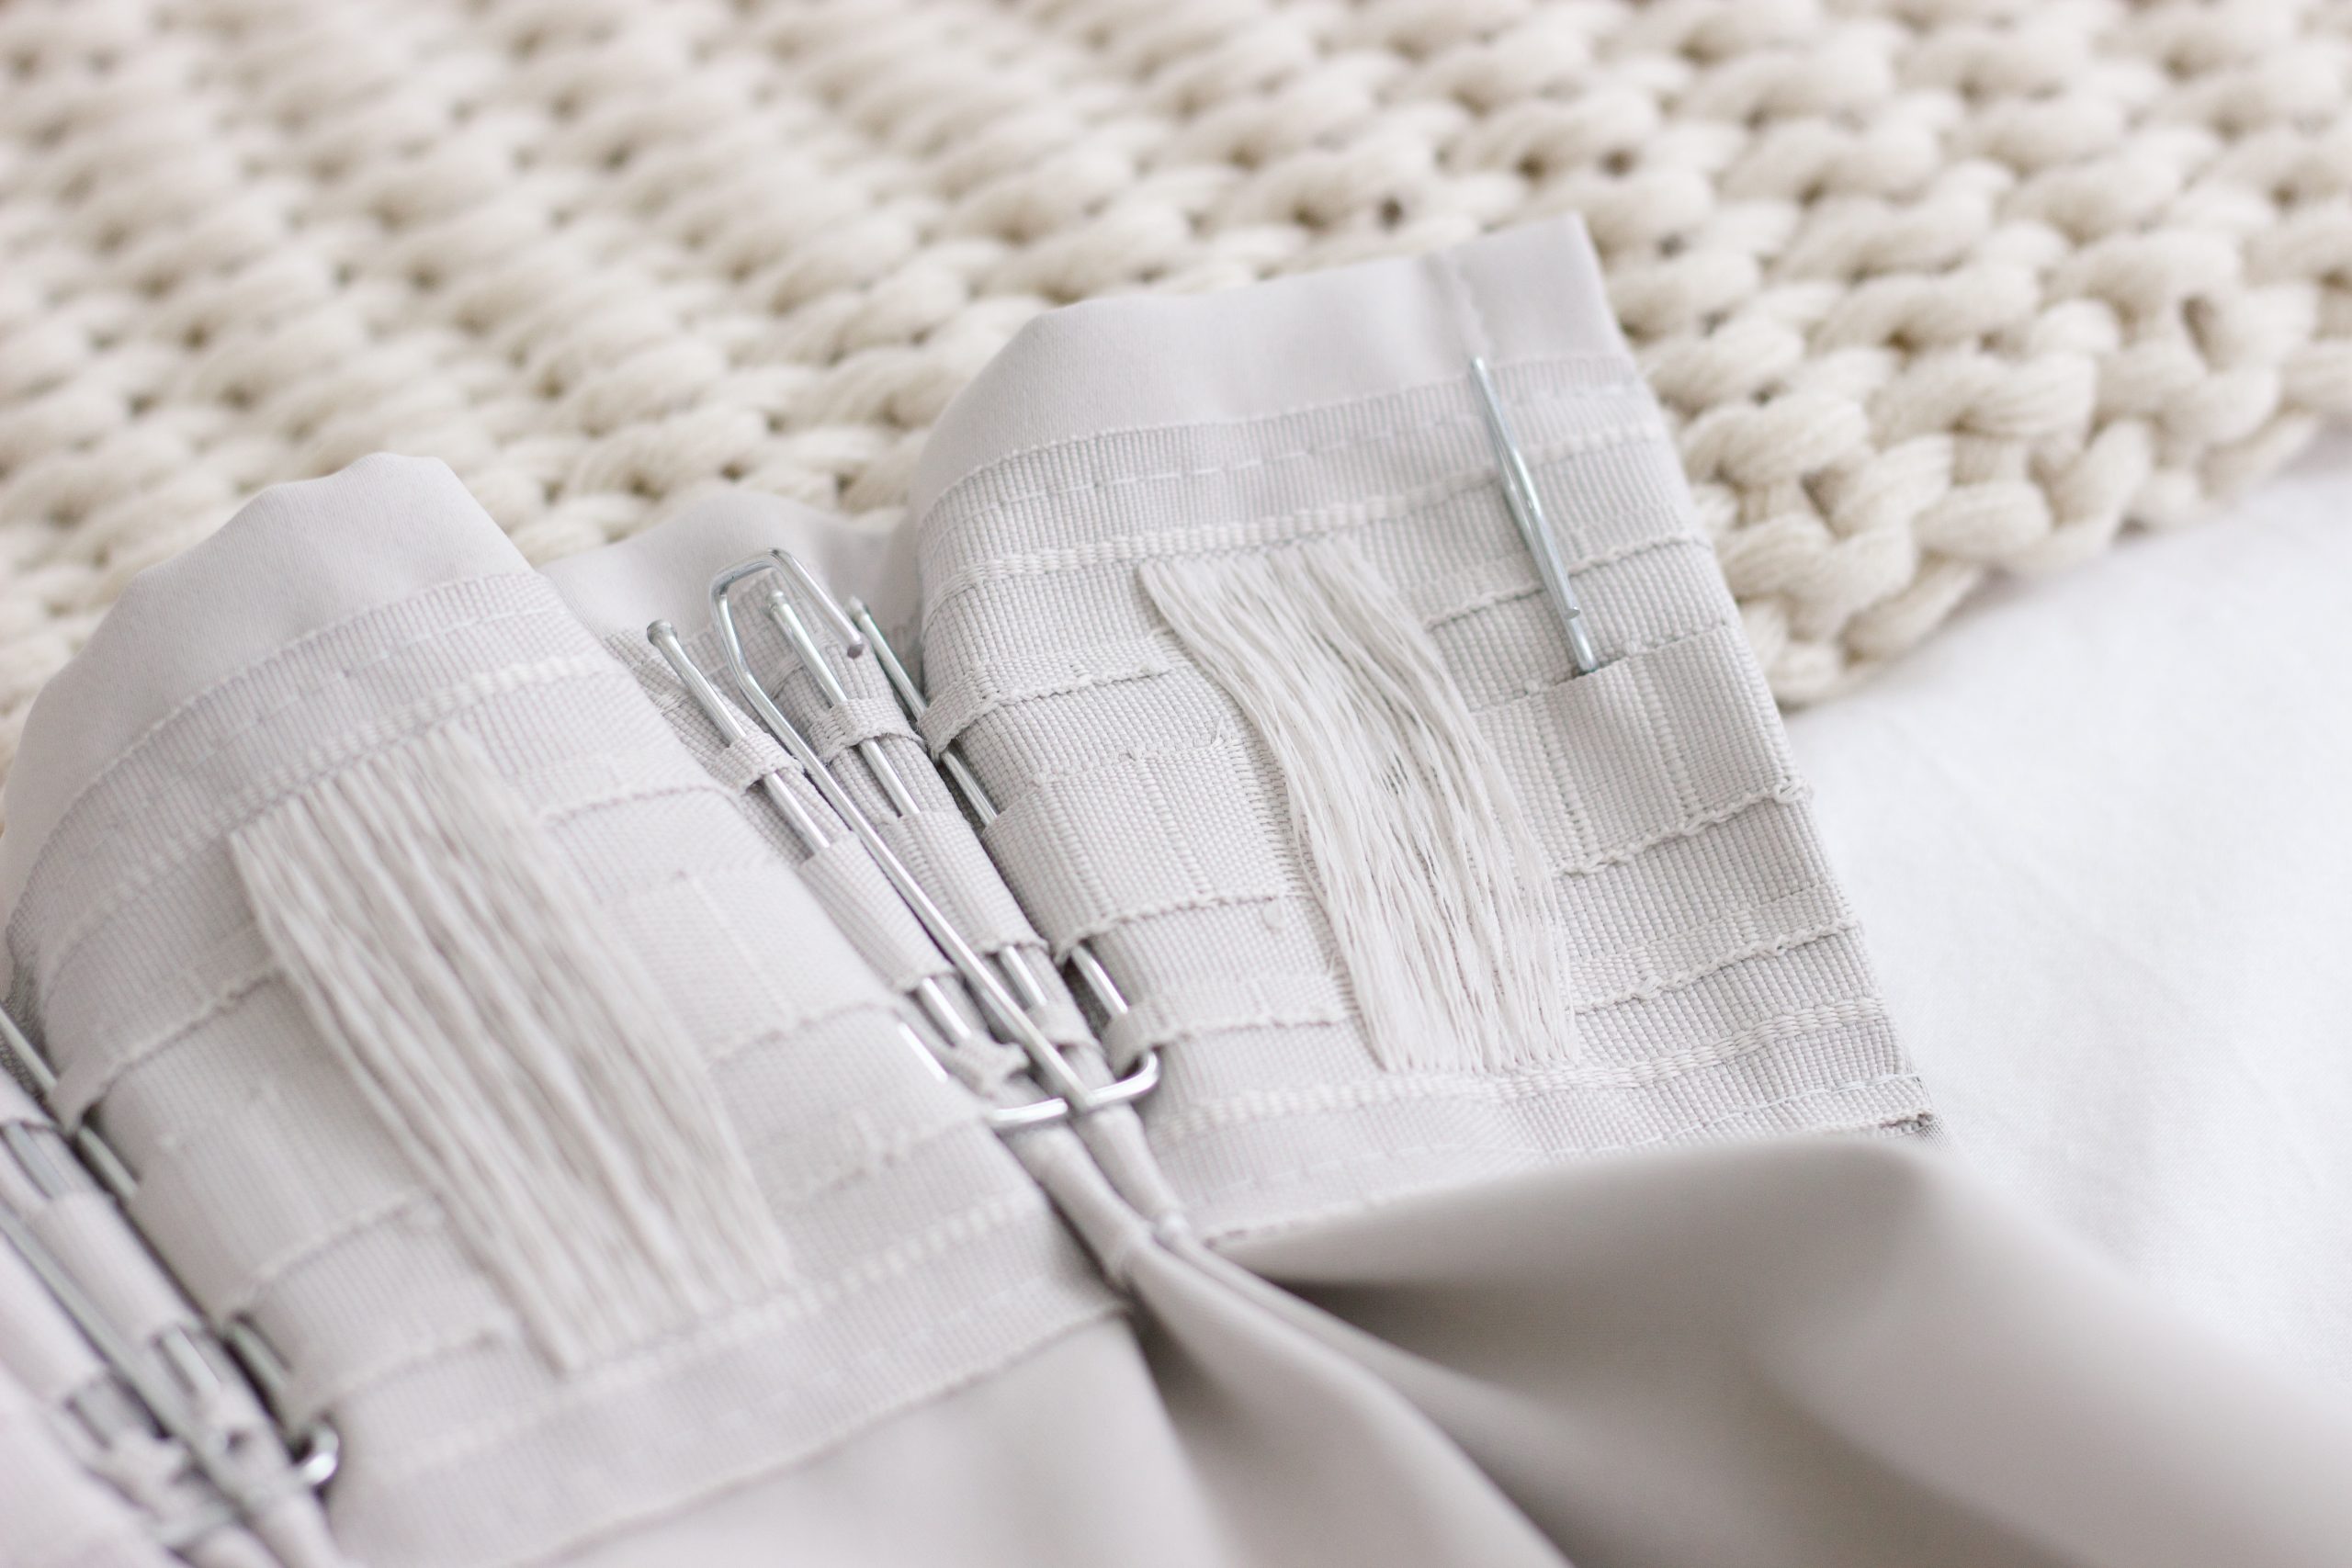
To create the triple pleat, I inserted the metal pegs in every third slot (counting from the threaded tabs). I personally didn’t find inserting the pegs to be too difficult, but if you’re struggling to stay in a straight line, you can mark out the slots with toothpicks to guide you.
Step 2:
Next, you’ll want to insert the drapery pins into each end of your pleater tape. I inserted the drapery pins above the second to last middle slot on the pleater tape so they would sit level with the pleater hooks. It took a little bit of finagling, but just make sure the pin is secure and doesn’t poke through the front of the curtain panel.
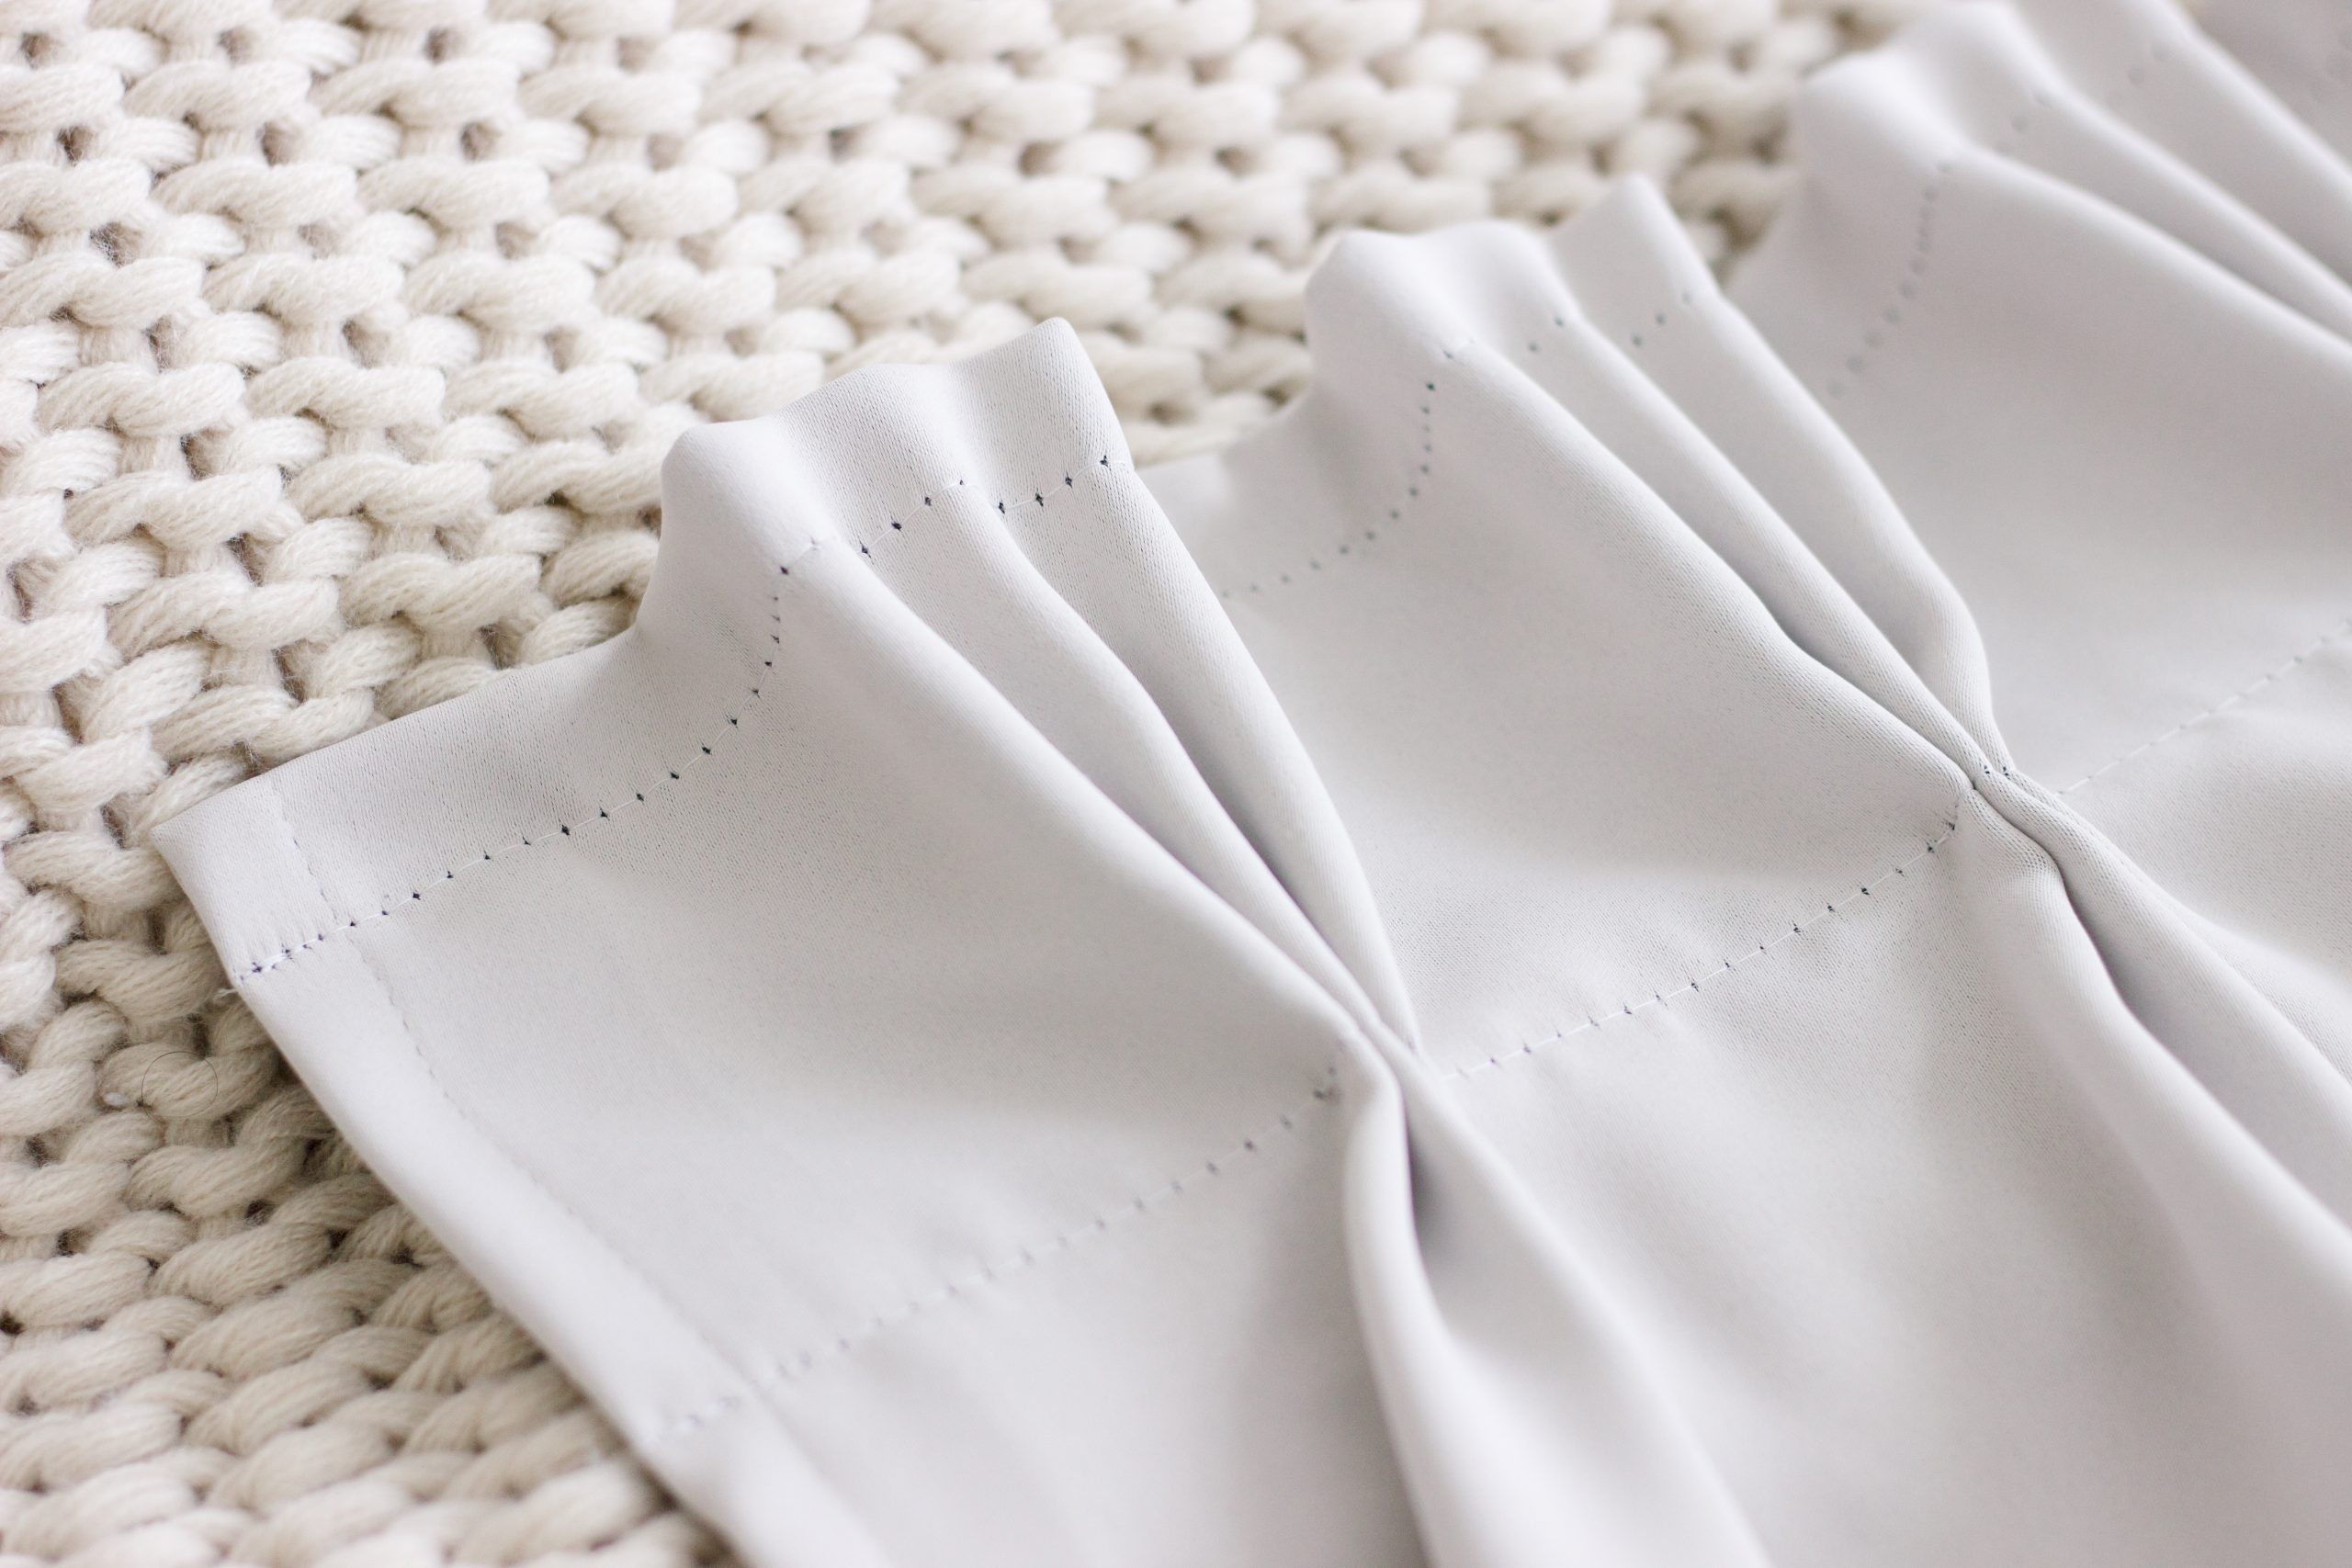
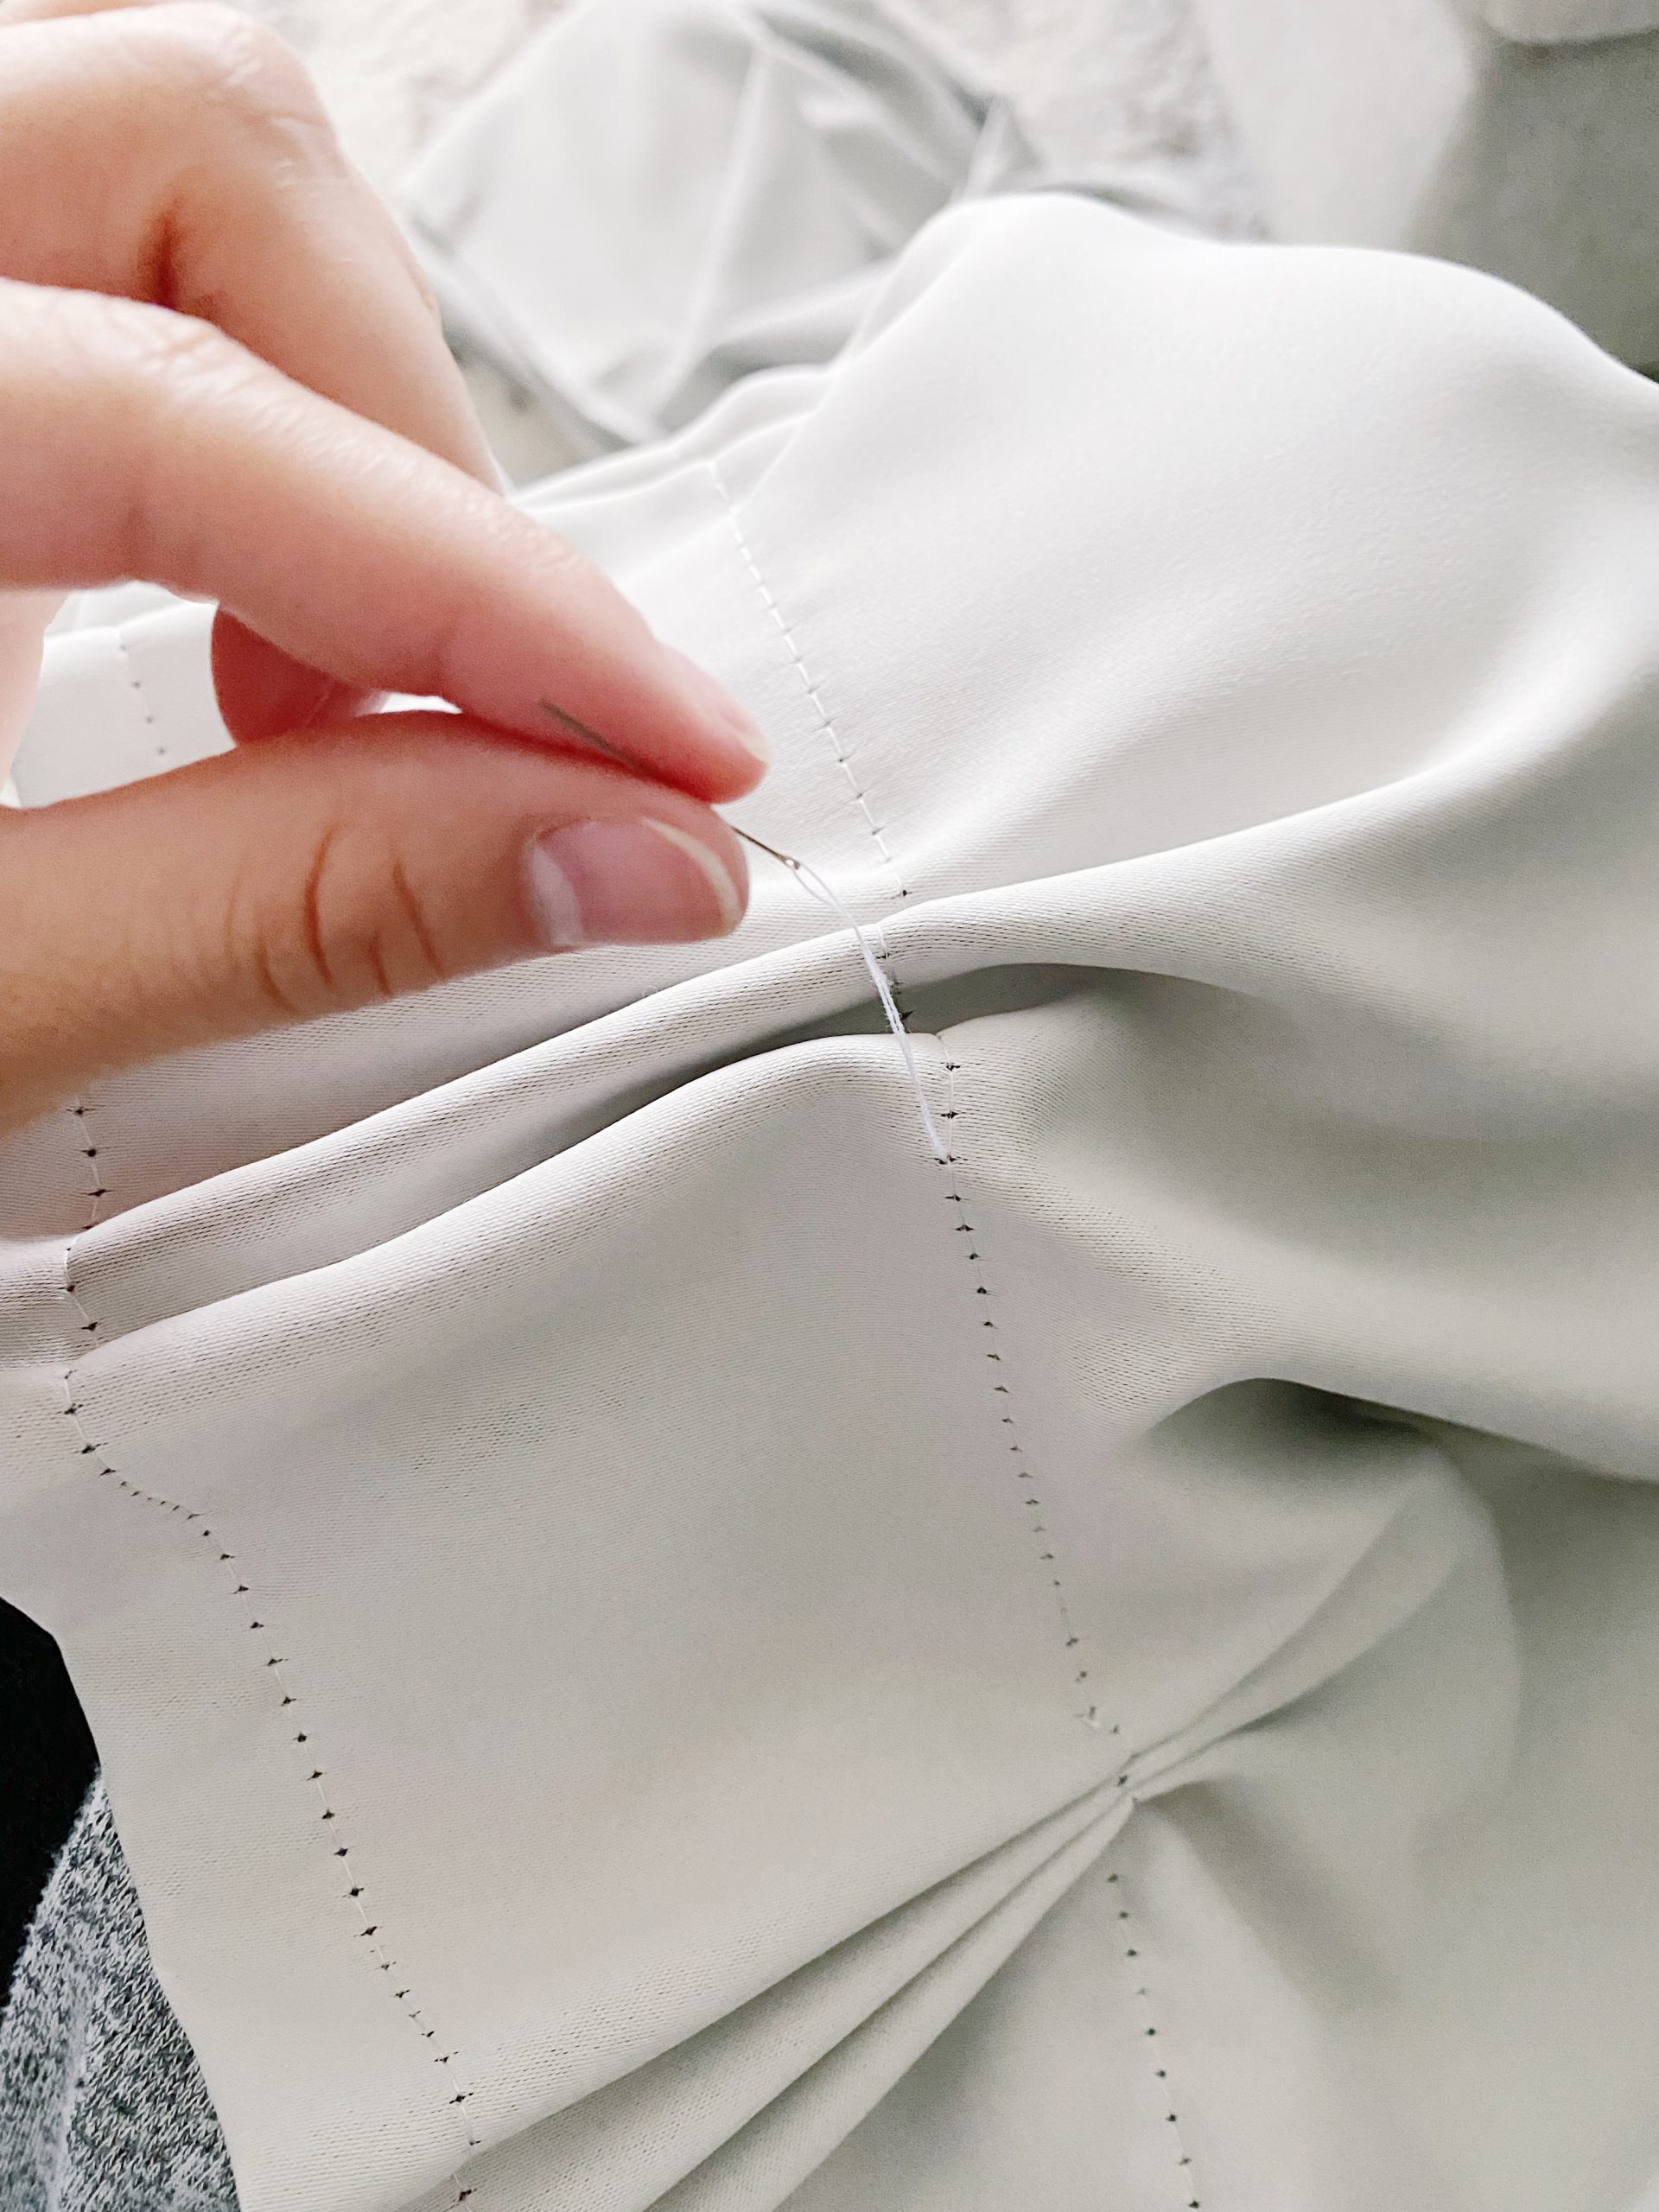
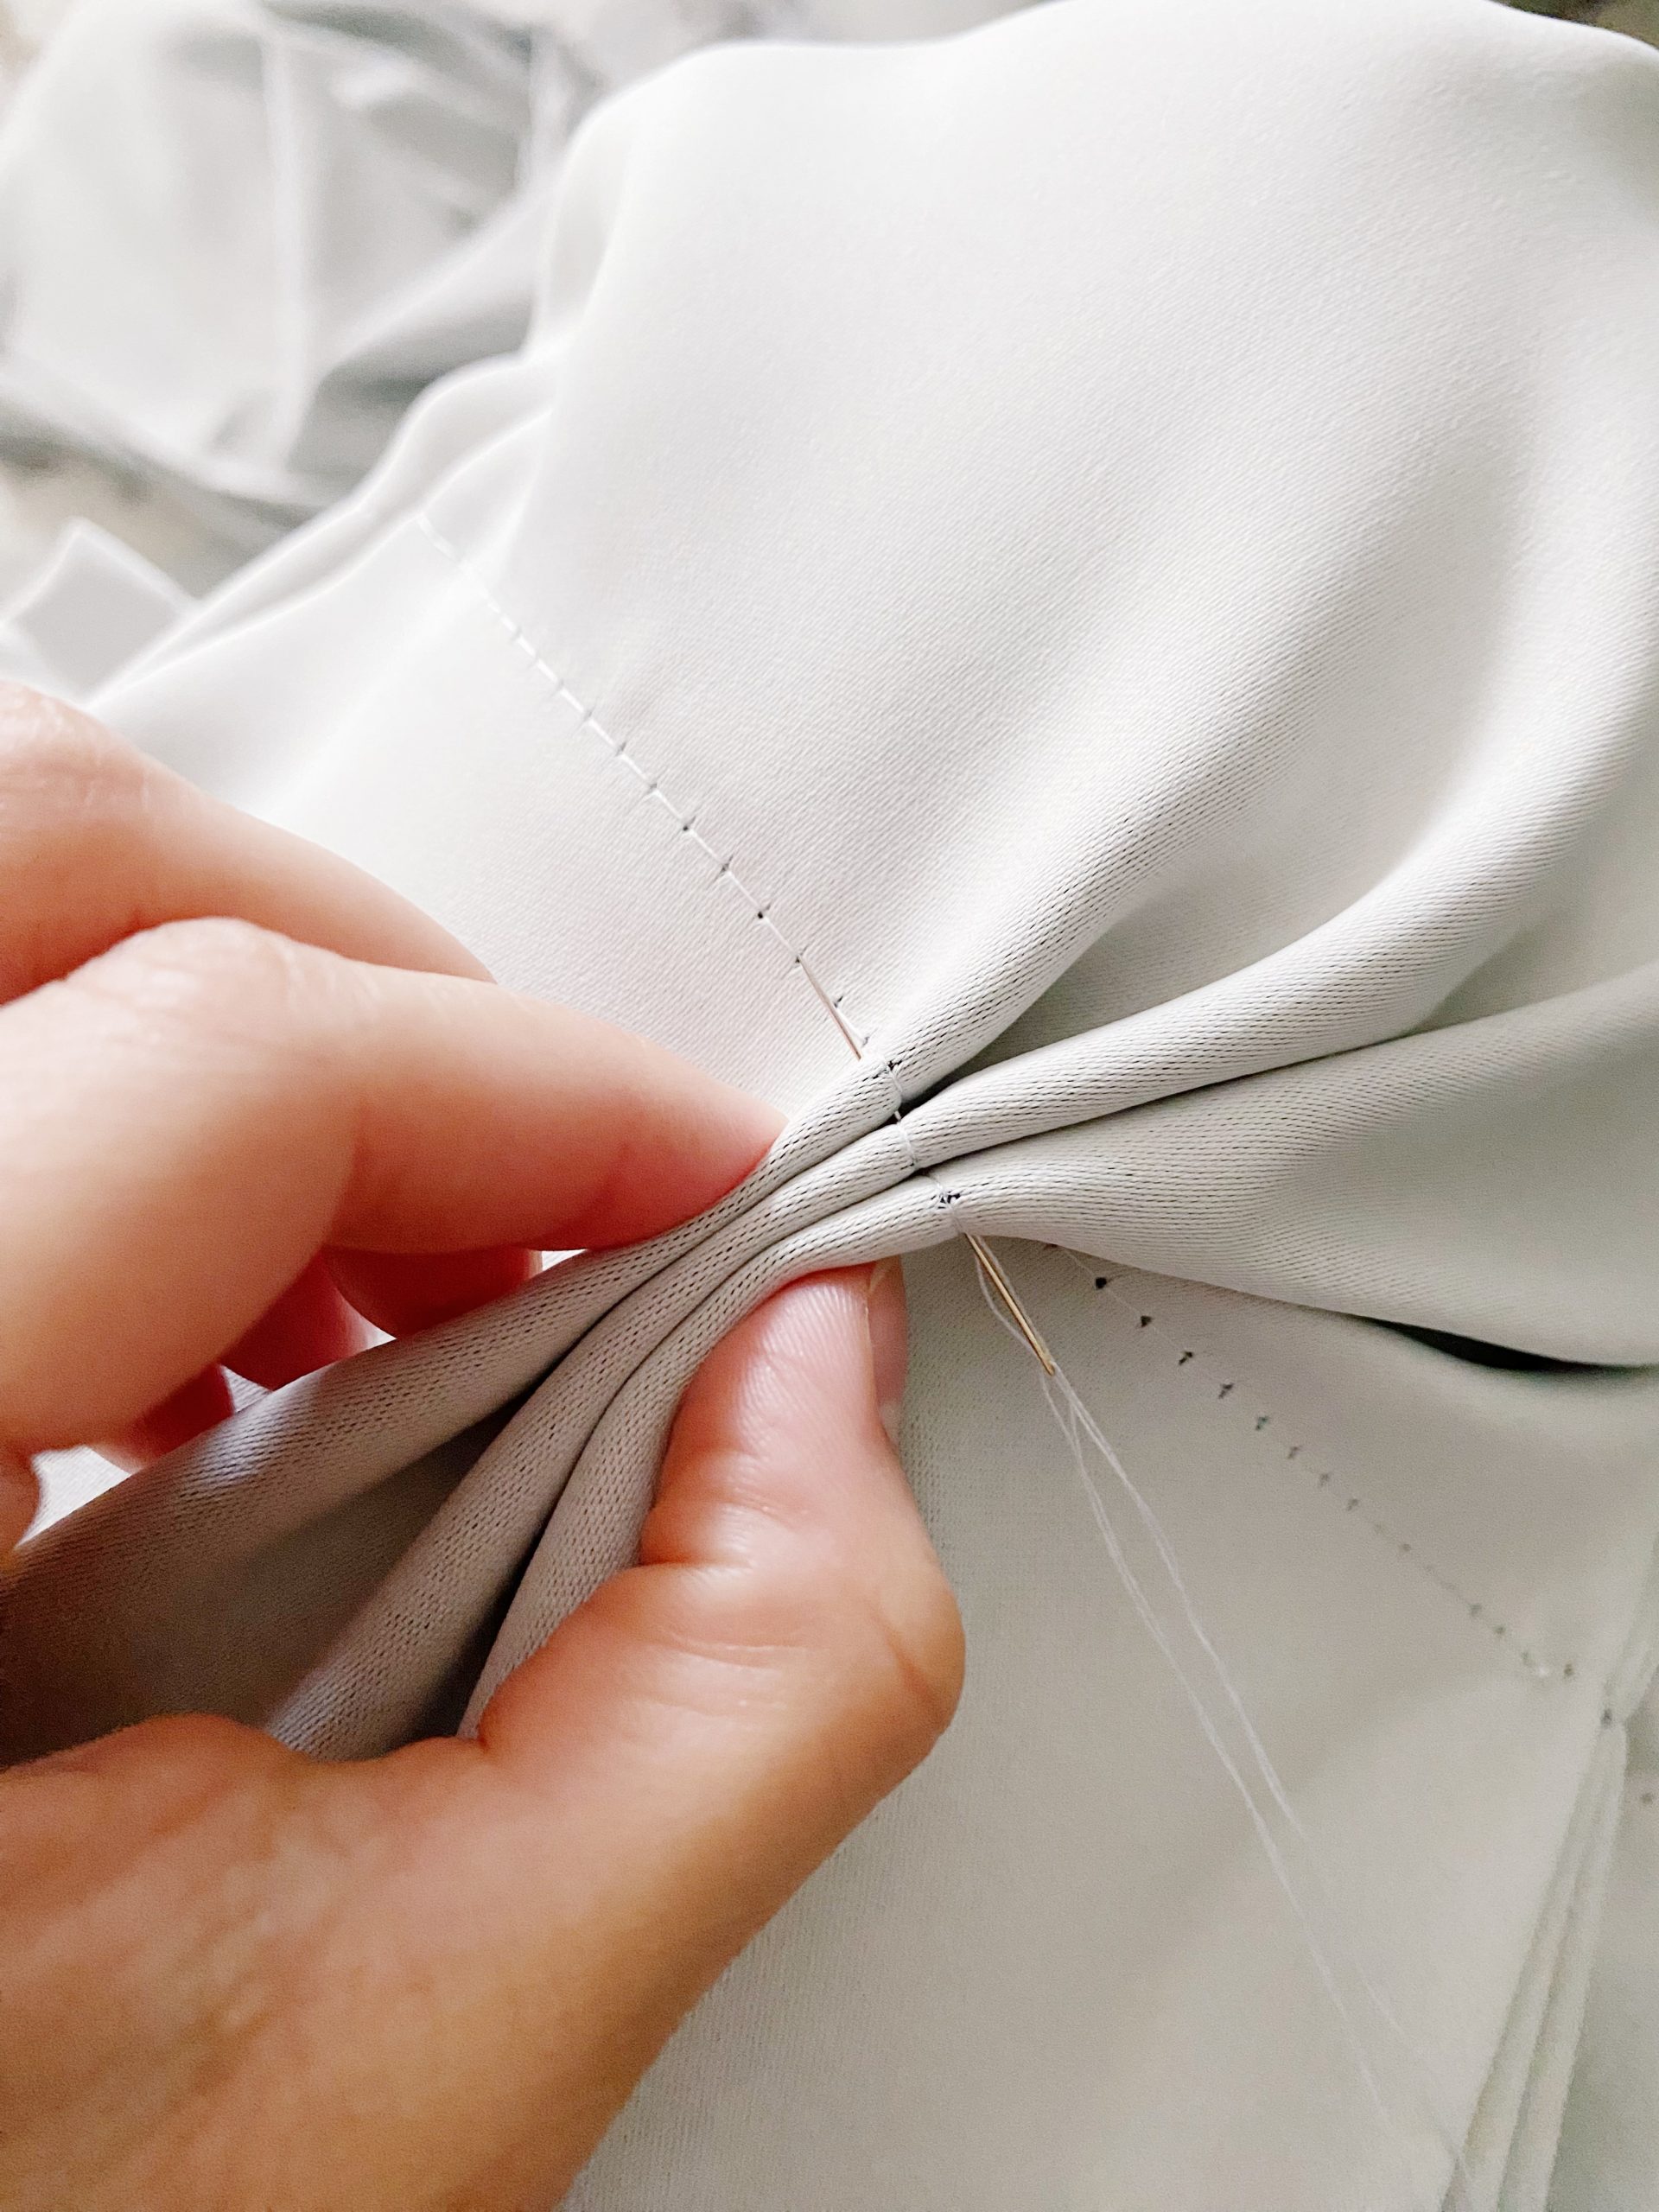
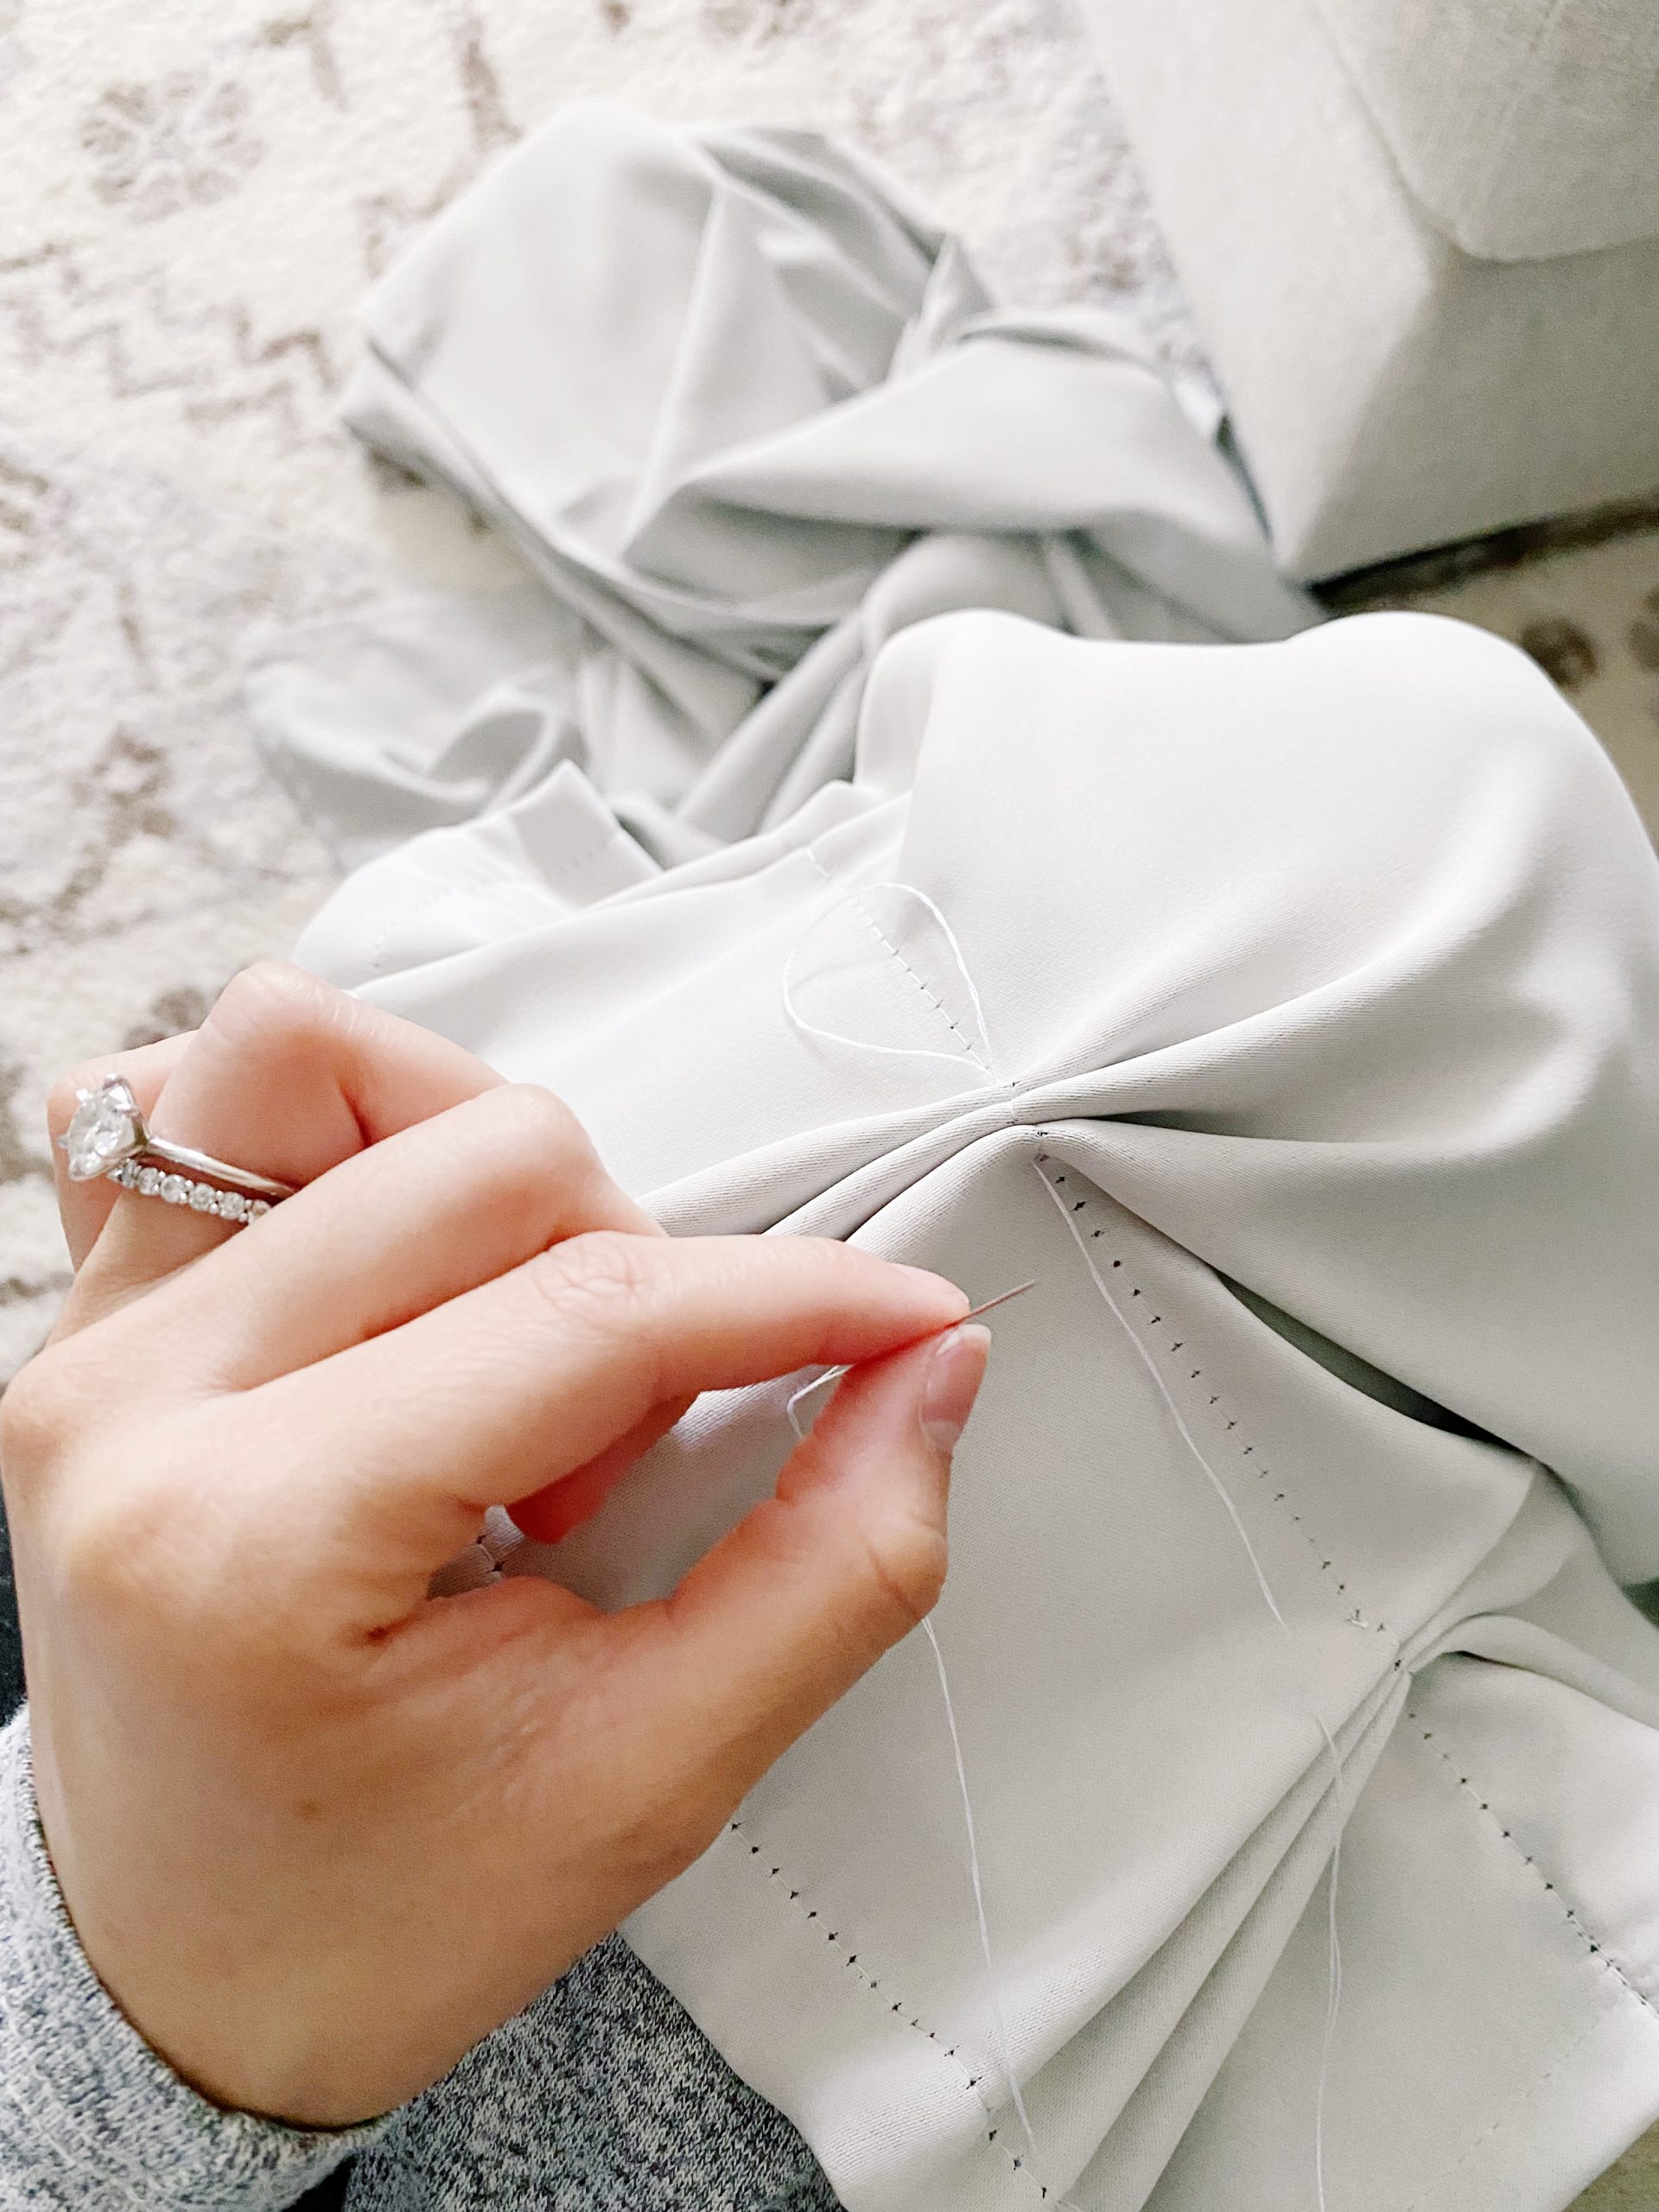
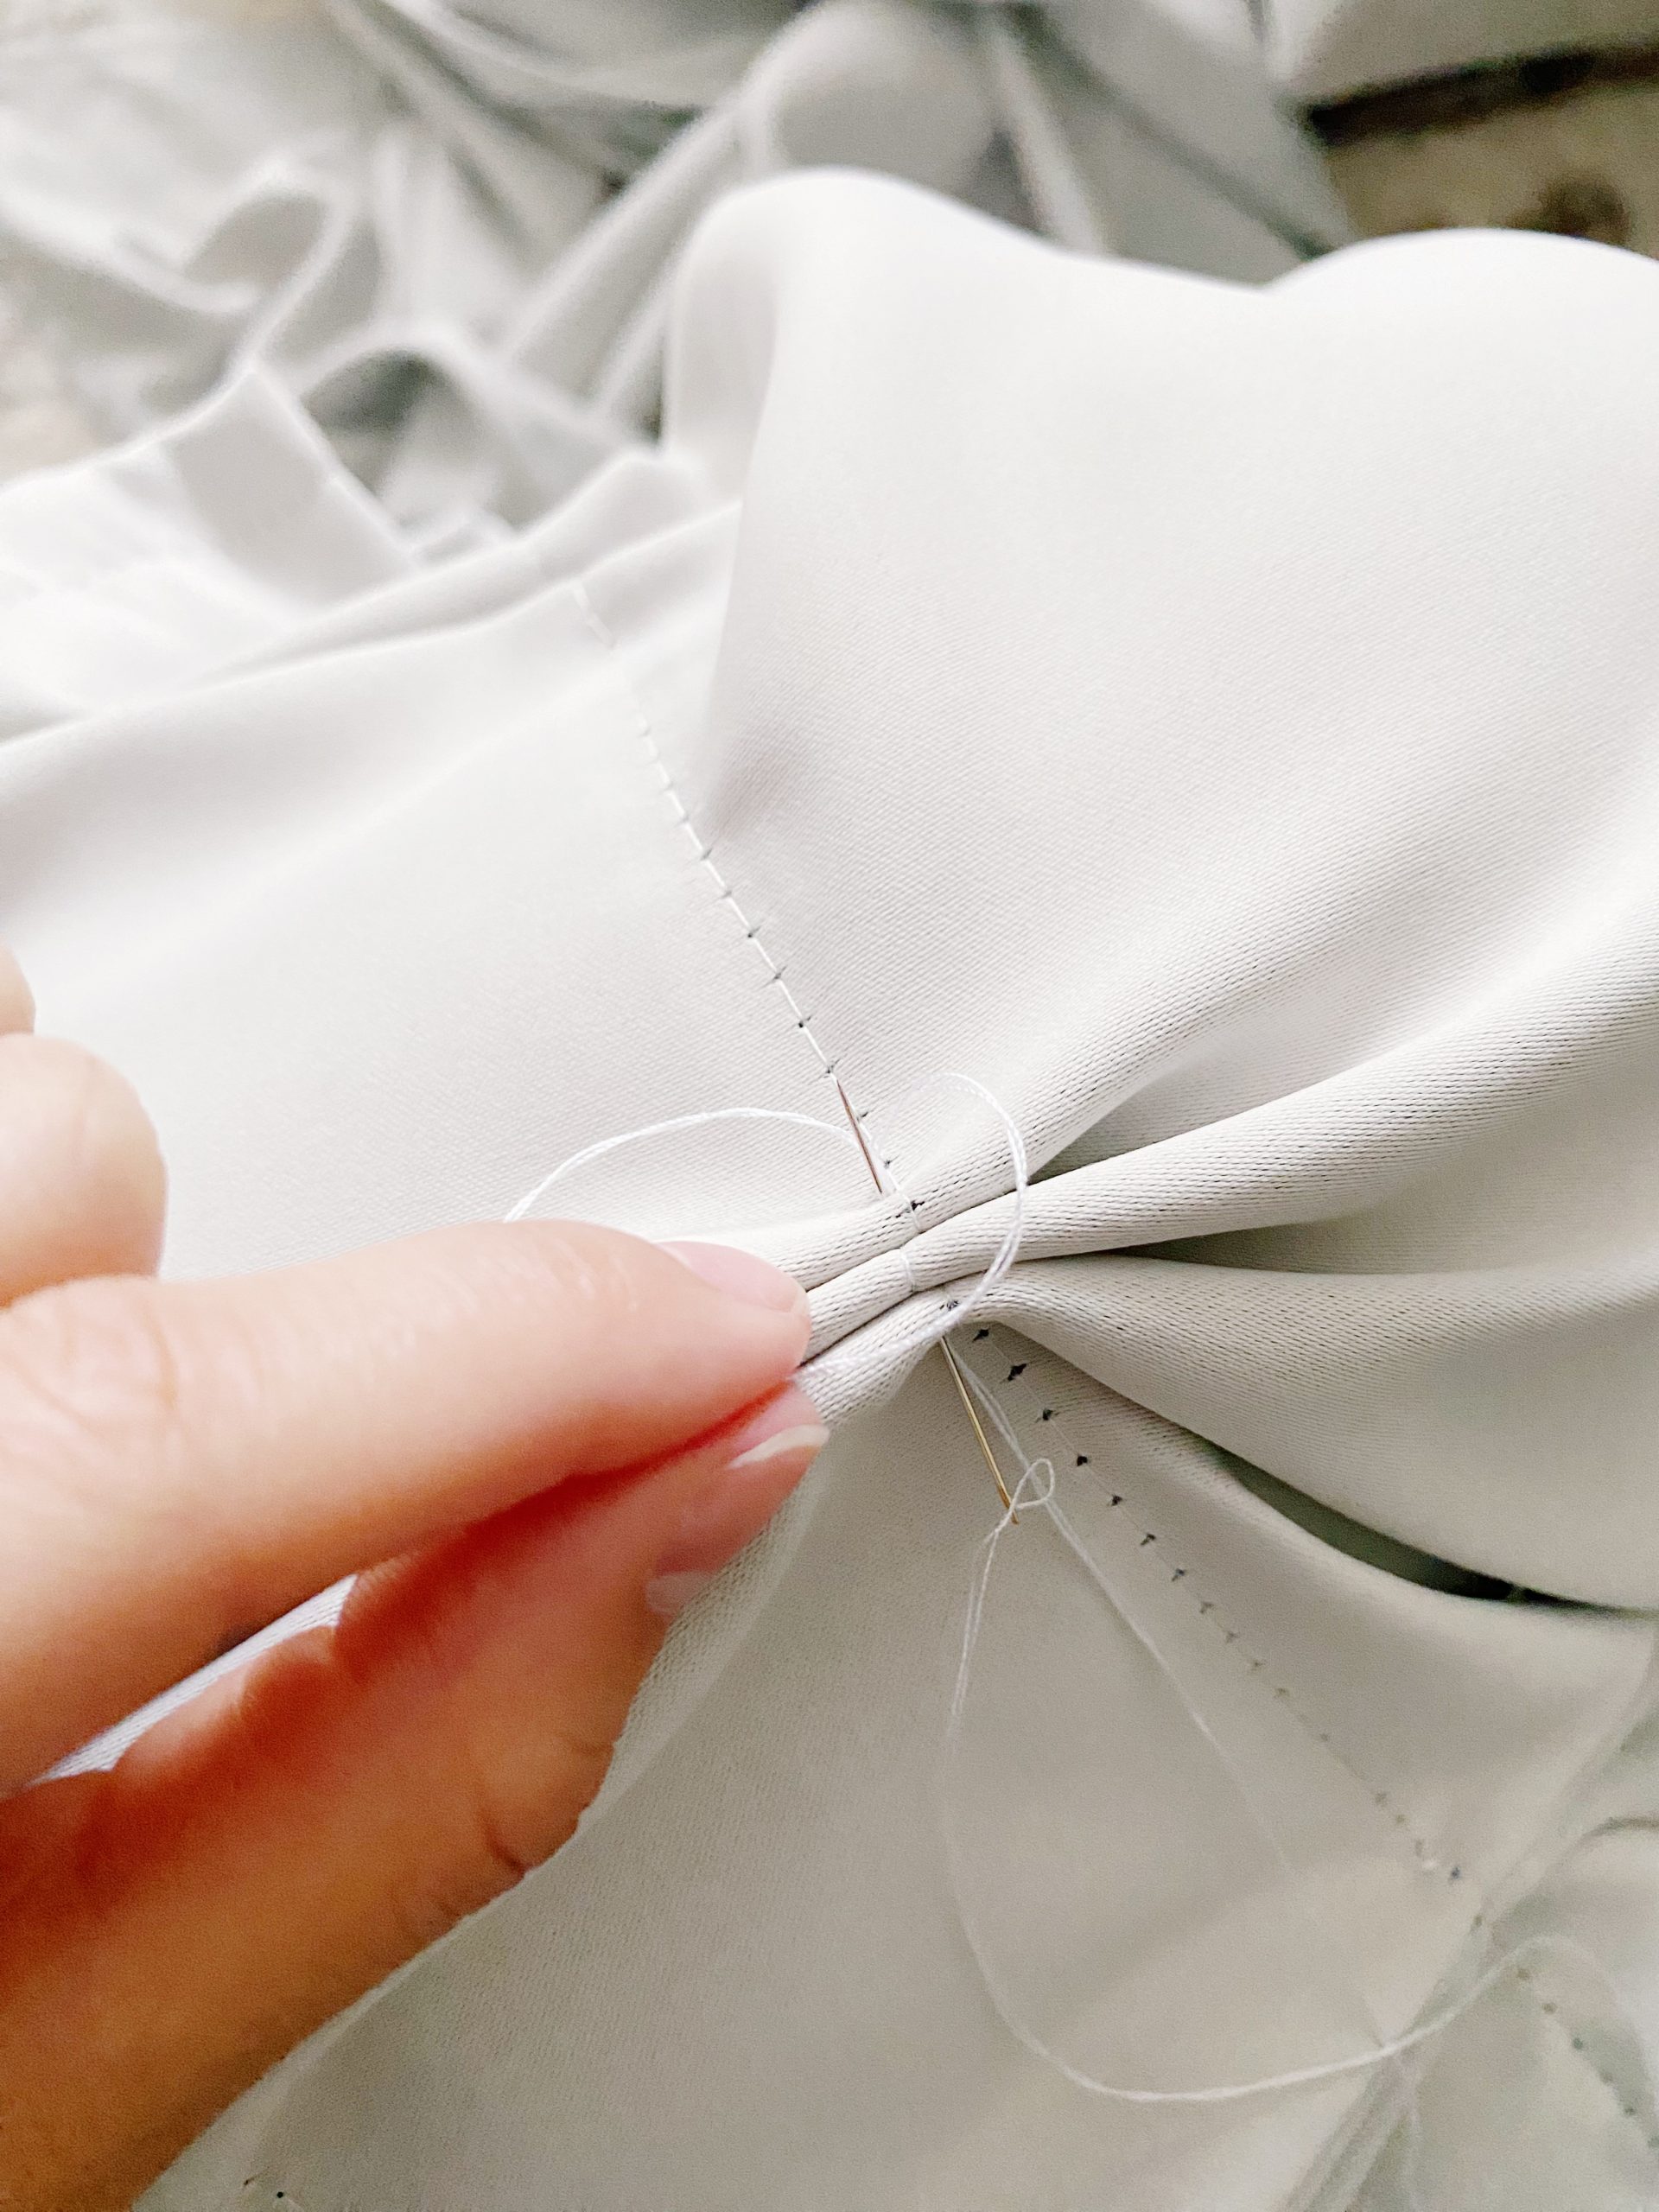
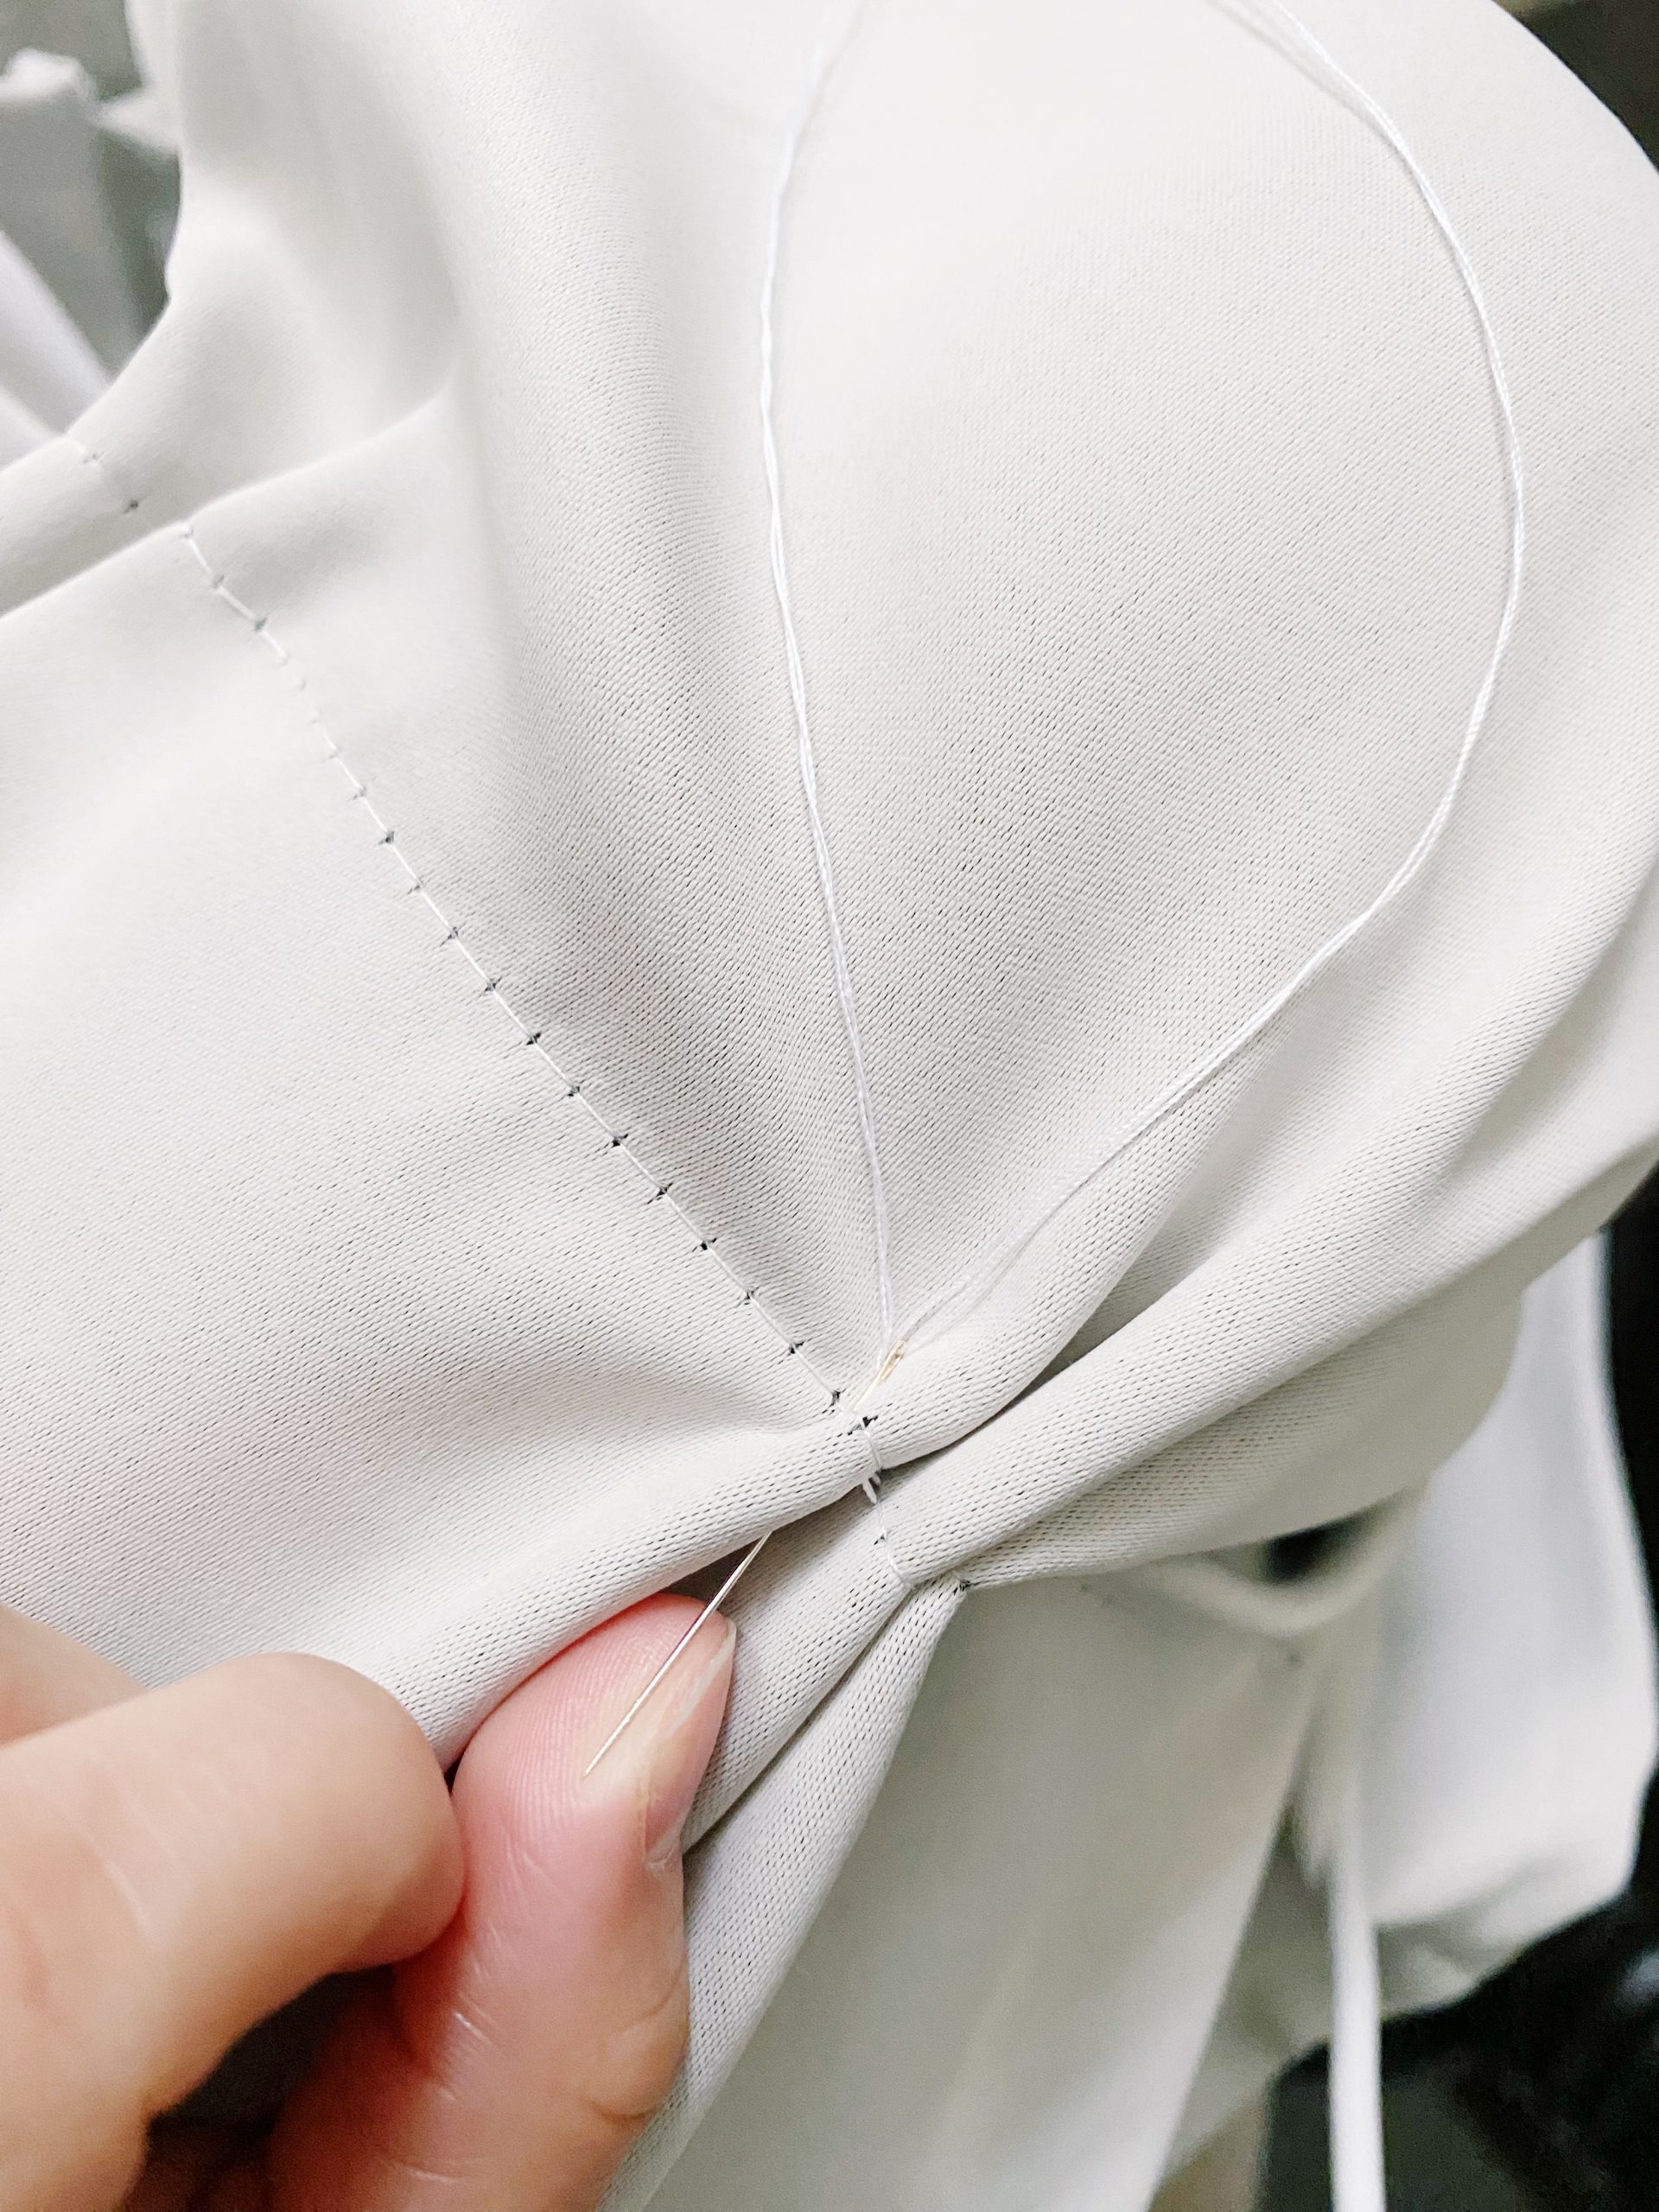
Step 3:
Now that you have all of your hooks installed, it’s time to sew the bottom of each pleat together. This is the step that makes all the difference visually. I’m not going to lie, it is rather time-consuming (it took me about 45 minutes per panel), but the final result is so worth it!

Step 4:
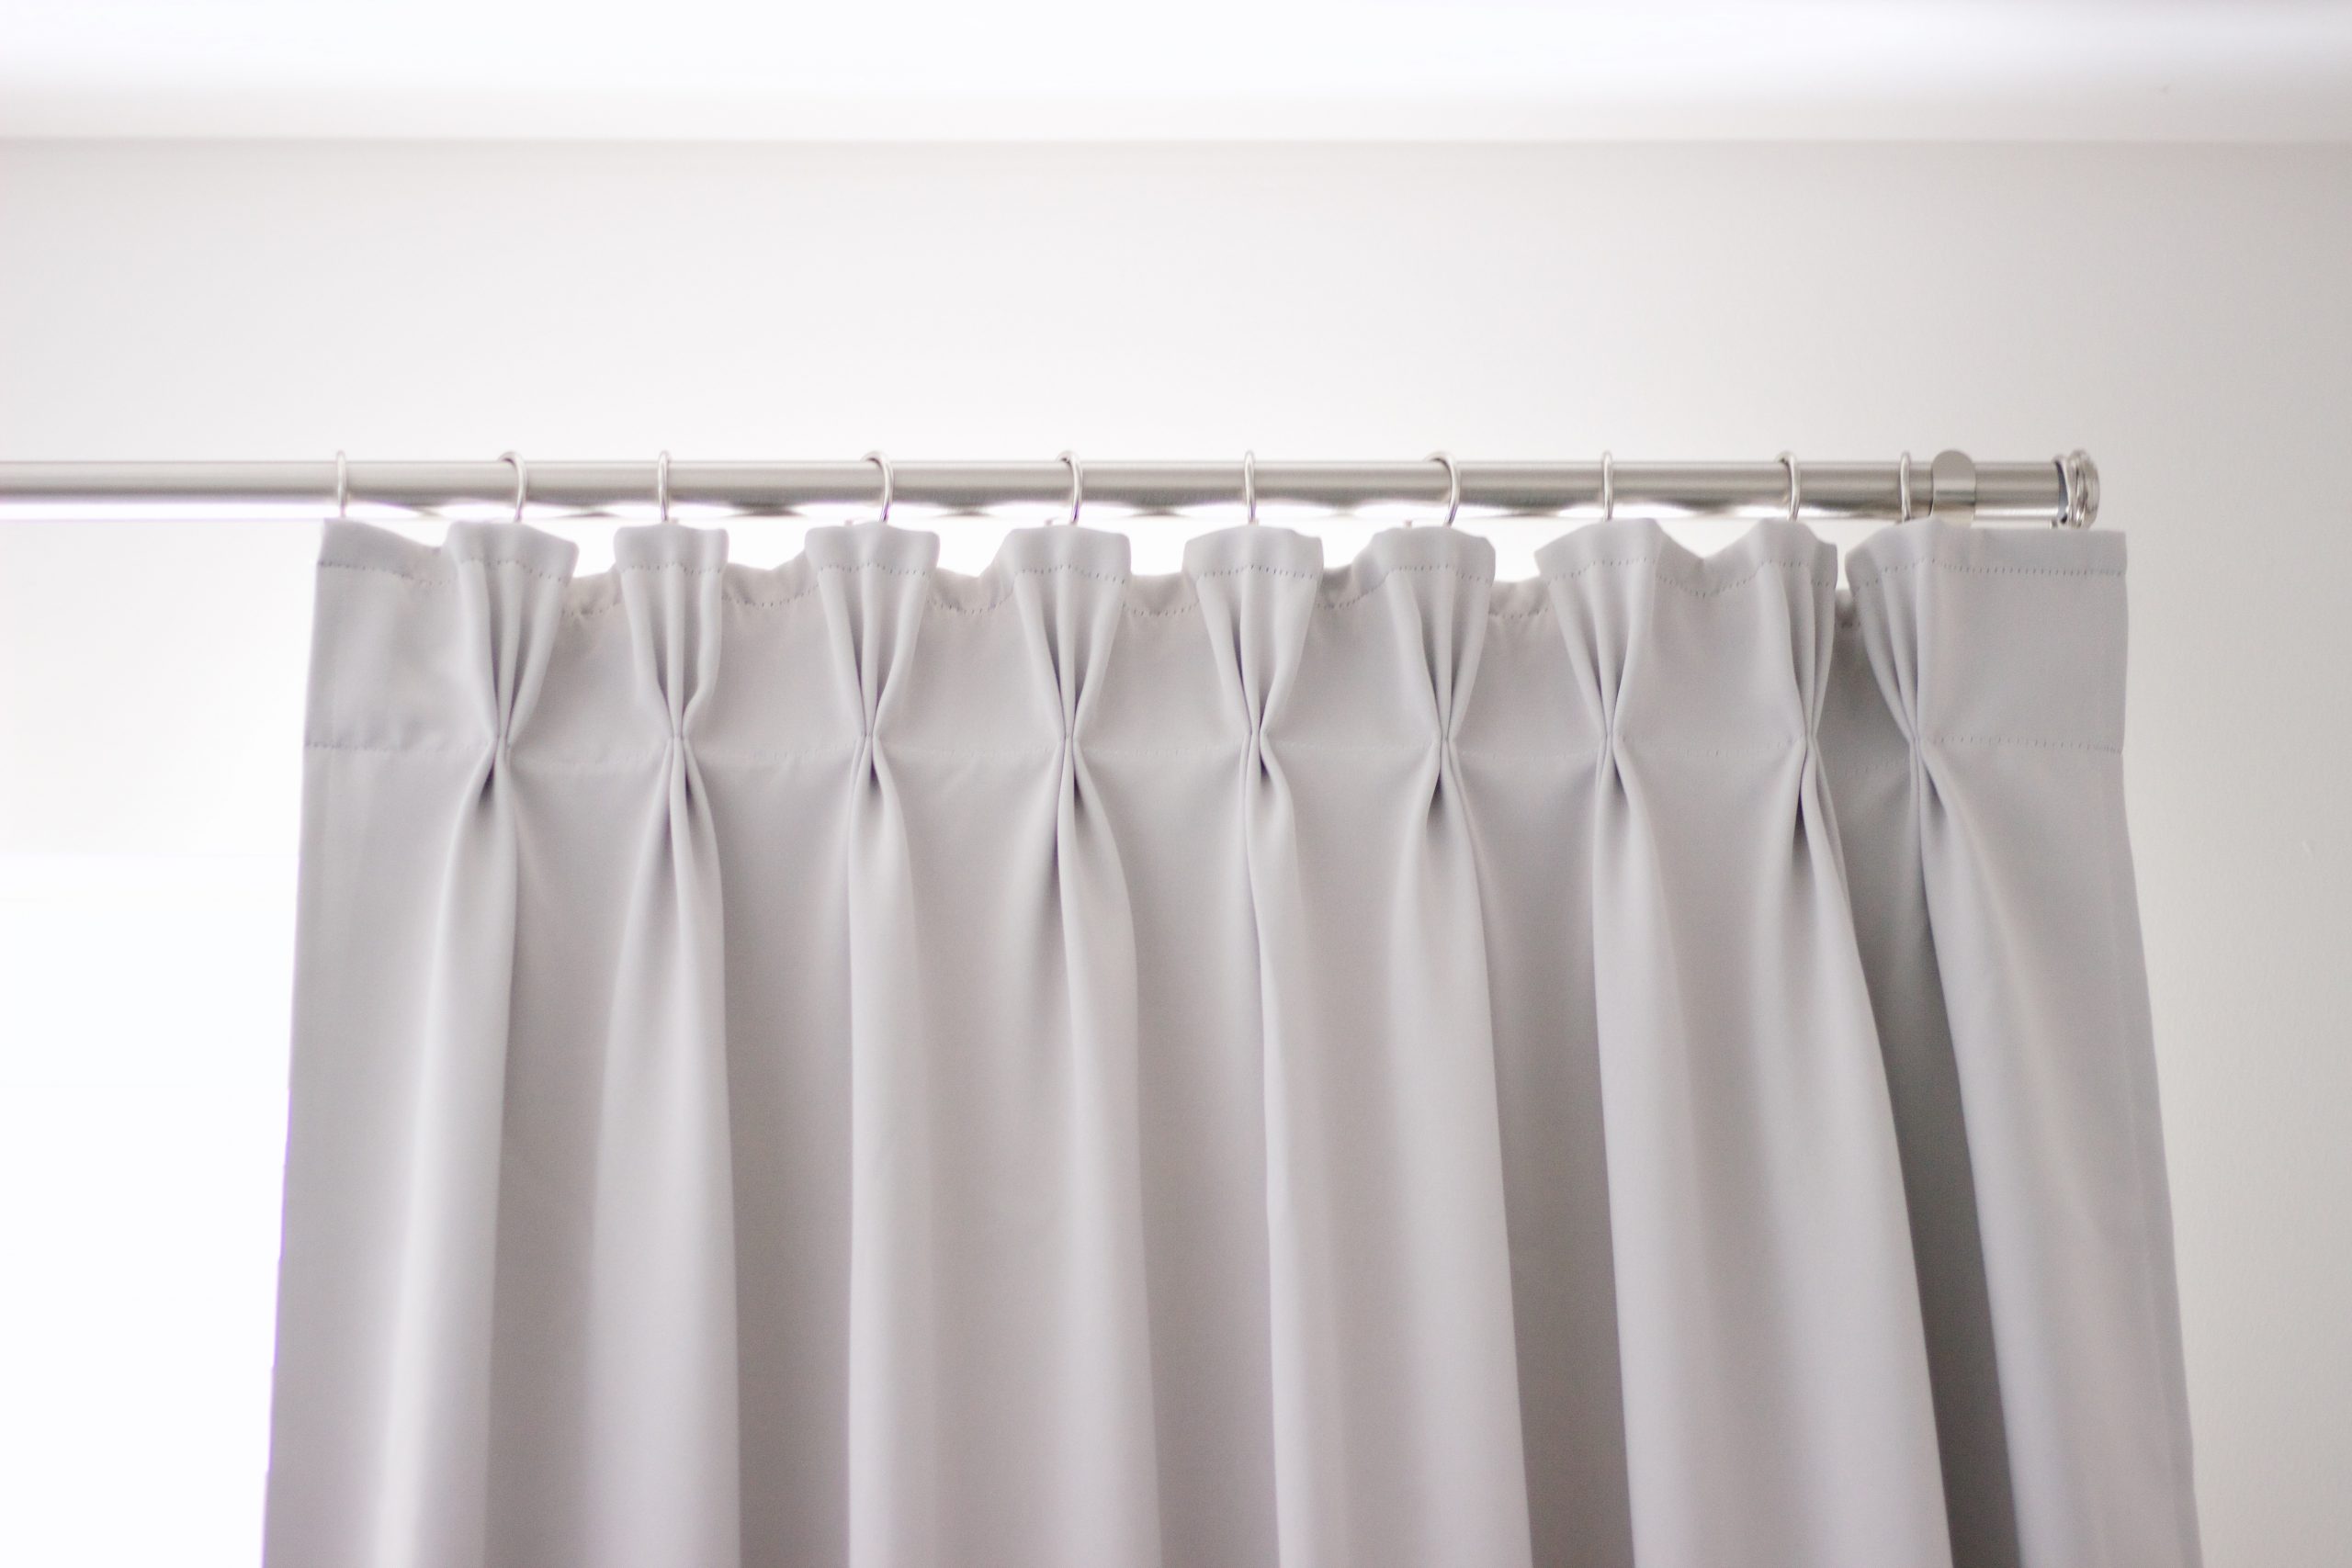
With all of the pleats beautifully finished, all you have to do is hang your curtain panels! The hooks easily slip through the loops on the curtain rings, and they make drawing your curtains feel so luxurious!
Designer Hanging Tips:
- For the most upscale look, hang your curtains above the top of your window – not at the top of your window. Aim to get as close to the ceiling as possible (you should still be able to easily move the panels along the rod, of course!).
- Curtain panels should always be floor-length and you should avoid standard 84″ panels entirely. The longer the better – you can always hem a panel that’s too long, but you can’t lengthen a panel that’s too short!
- To allow the maximum amount of daylight in, hang your curtain rod brackets at least a foot wider than your window (6 inches on each side). This will create enough space for your curtain panels to be pulled open completely during the day (exposing the entire window).
- If you’re having trouble with your curtains staying in place, you can sew tiny weights to the corners of each panel. This will create a long, straight line with a neater and more tailored look.
- If your drapes are wrinkly (which they likely will be straight out of the package), don’t forget to steam them to polish off the look!
In total, this project cost us about $85 per window in our bedroom (including the panels and all hardware) and about $65 for the window in our living room – much better than the $350+ we’d be looking at per window if I bought pinch pleat curtains rather than doing it myself! I’m thrilled with how this project turned out, and I hope this guide helps y’all achieve the same designer look in your own homes!
Malia


Leave a Reply